How to Adjust Stock Quantities, Costs, and Inventory Valuation in Invent ERP
Learn how to perform inventory adjustments for stock counts, quantity corrections, cost updates, and inventory reconciliation.
Step-by-Step Process
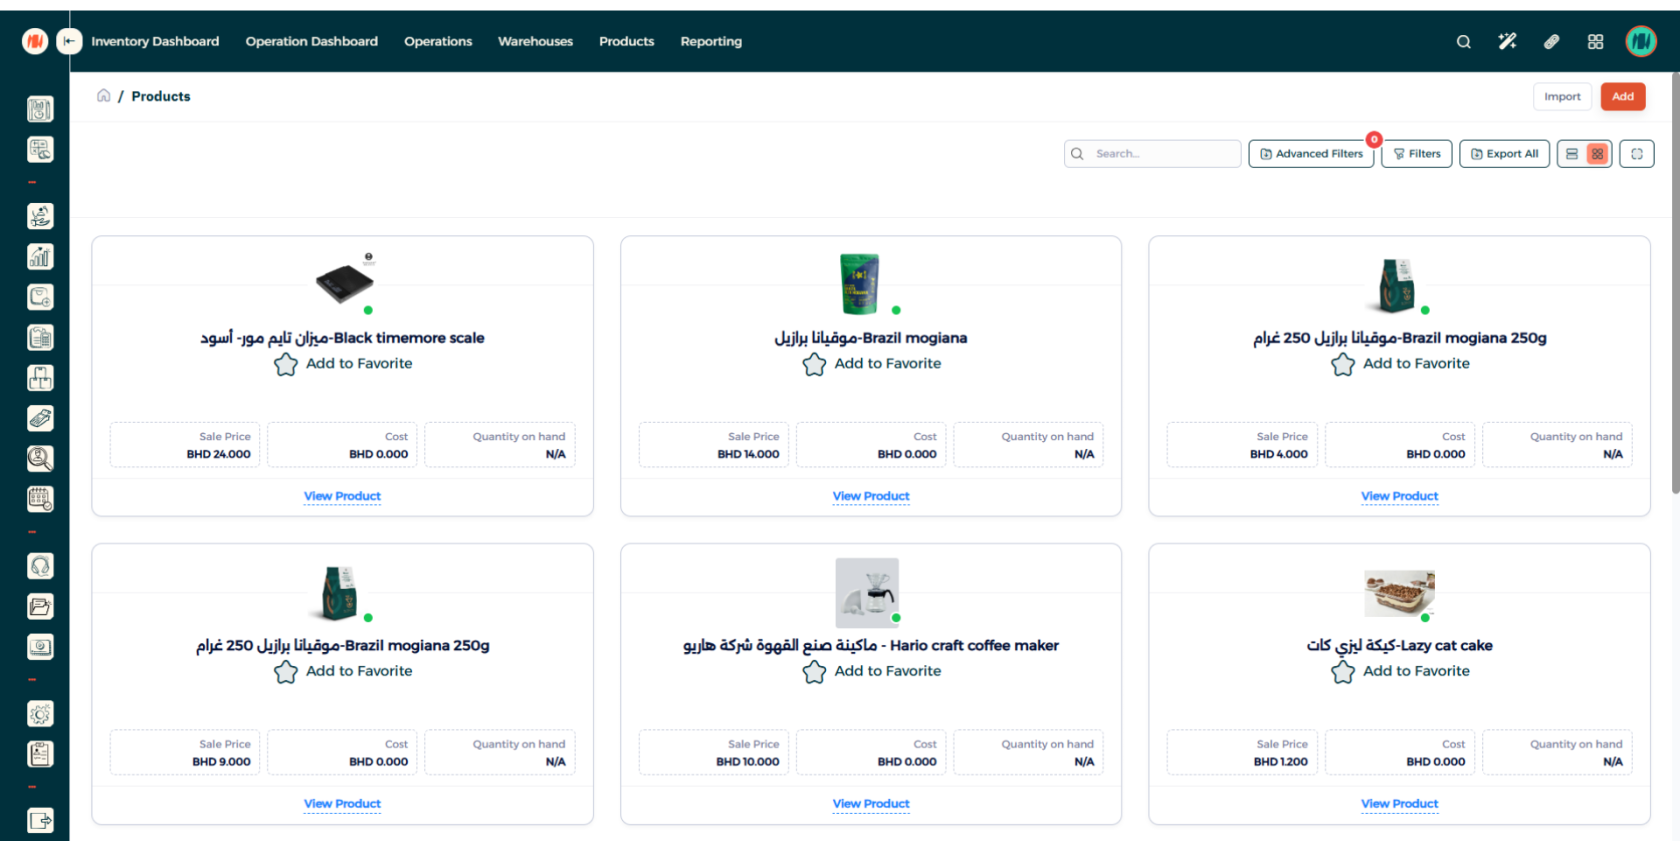
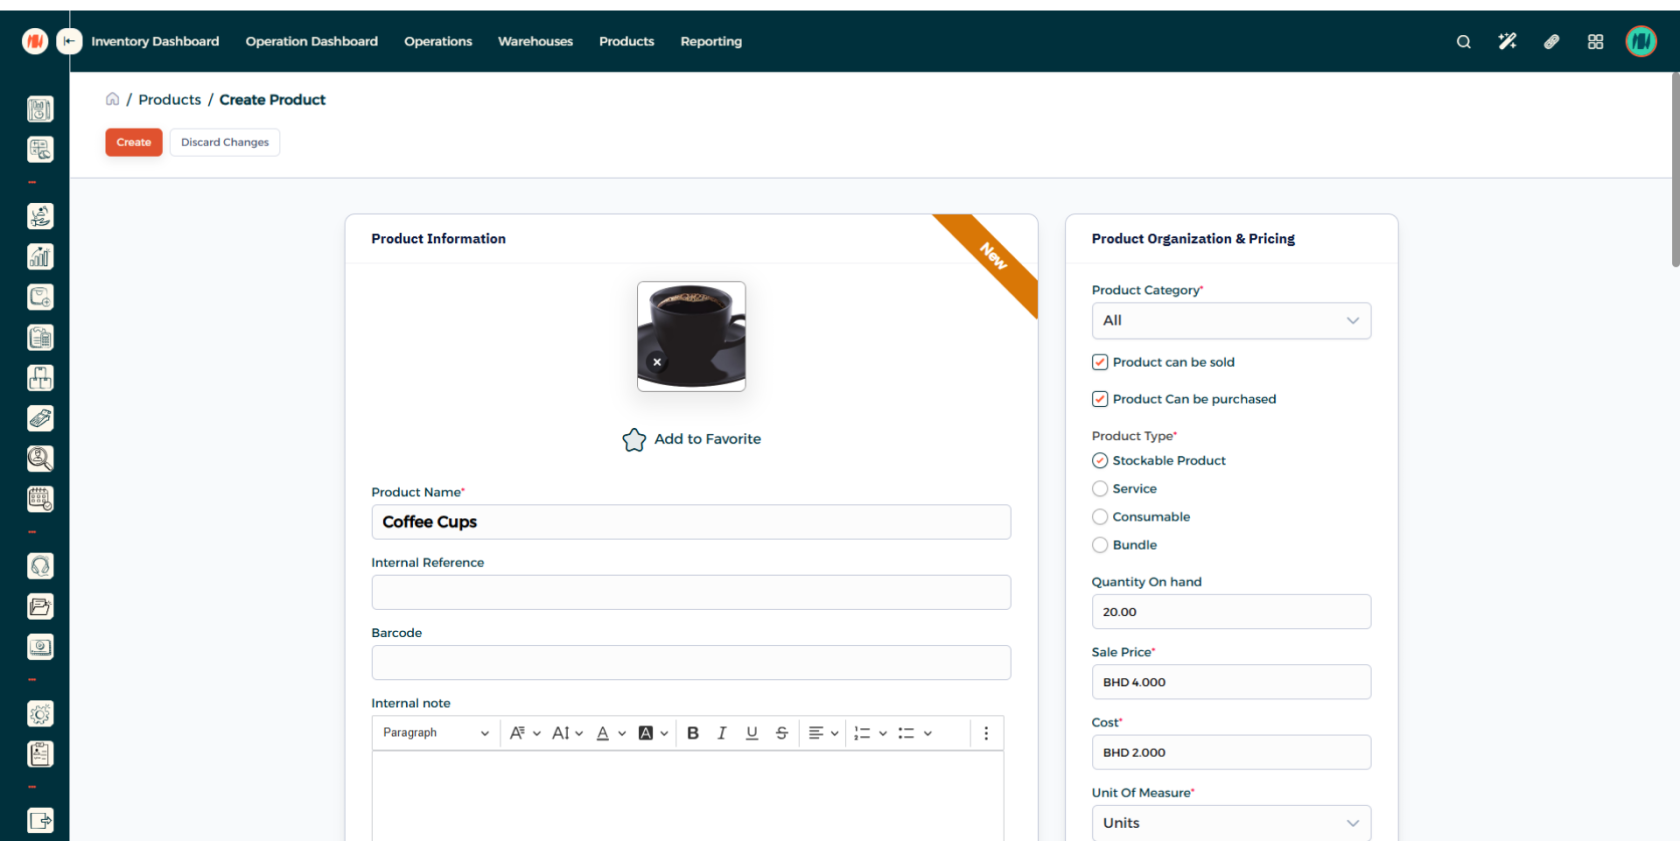
Step 1: Add a Stockable Product
Navigate to your inventory module, then click on add in the top right corner to add a product.
Step 2: Fill out Product Details
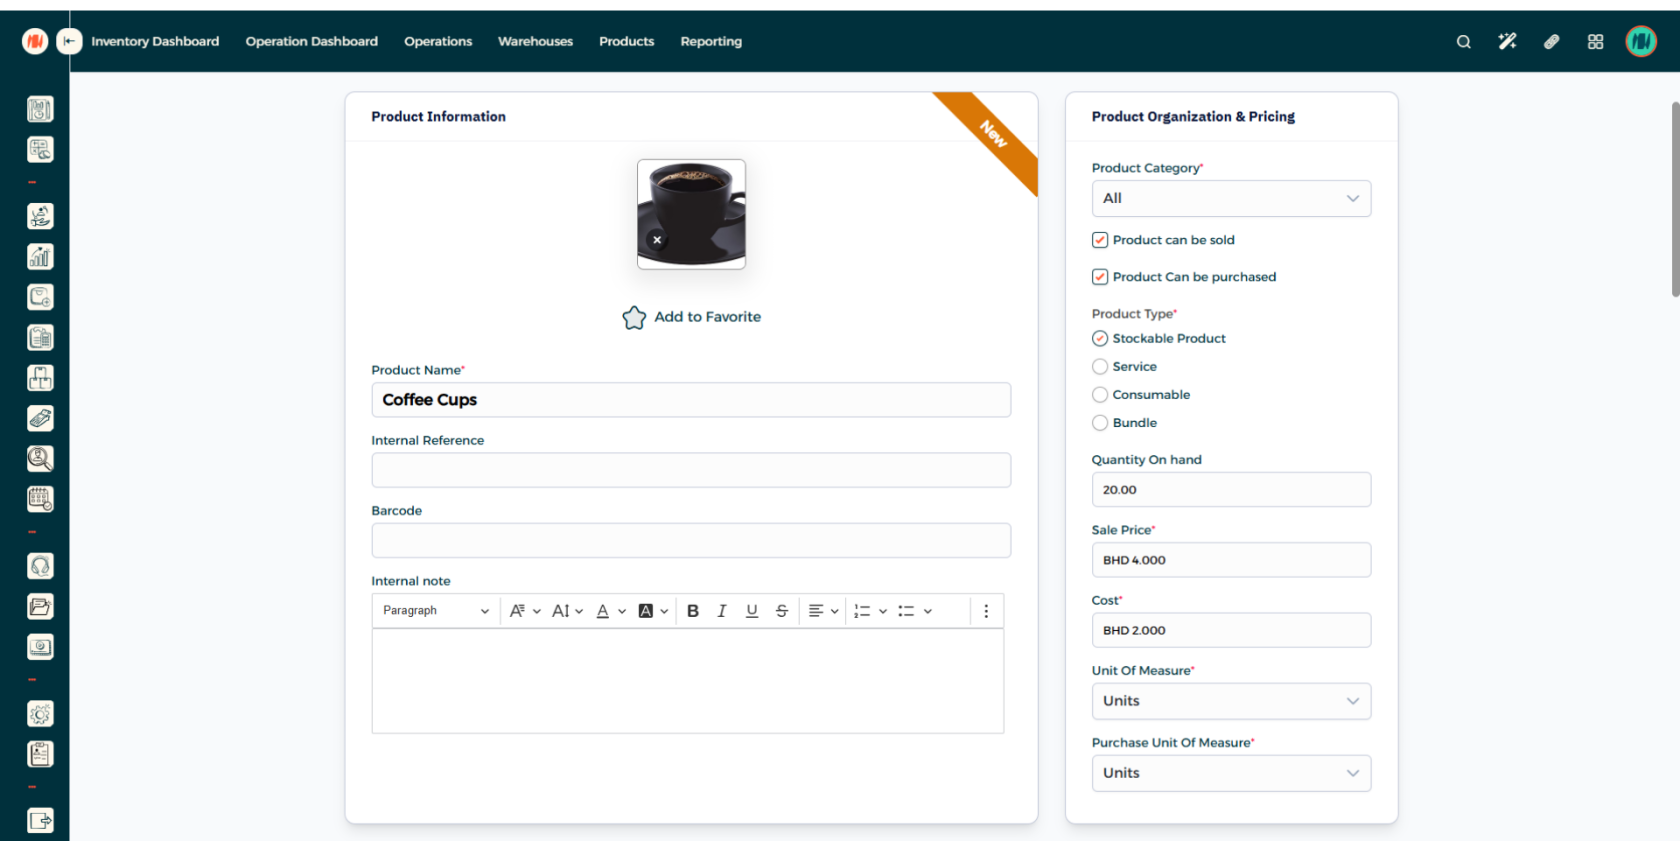
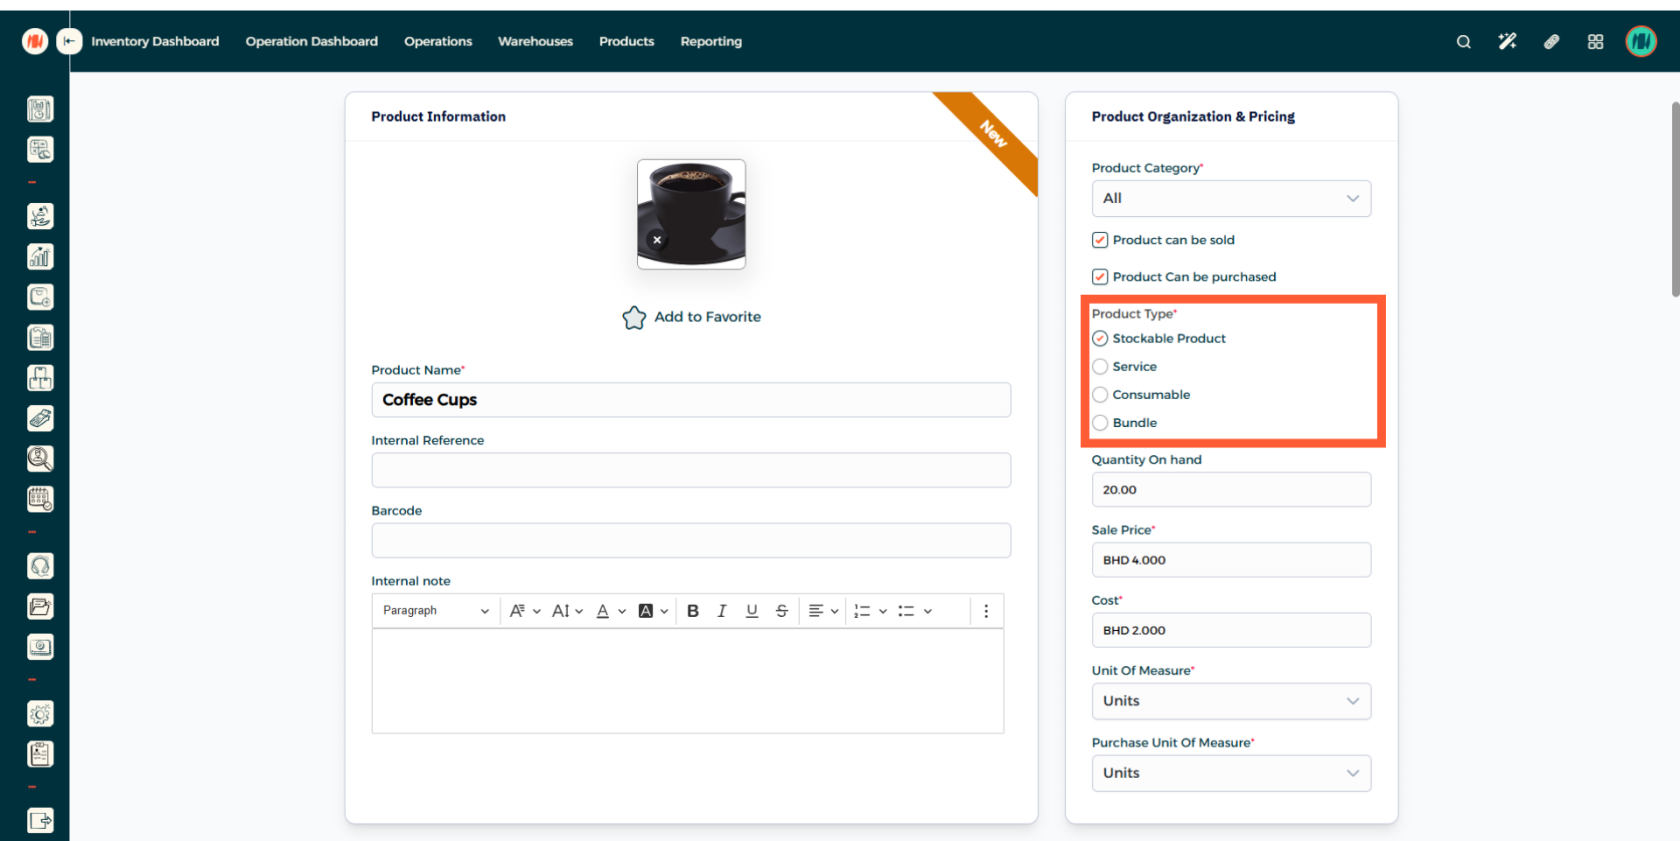
Step 3: Select Product Type
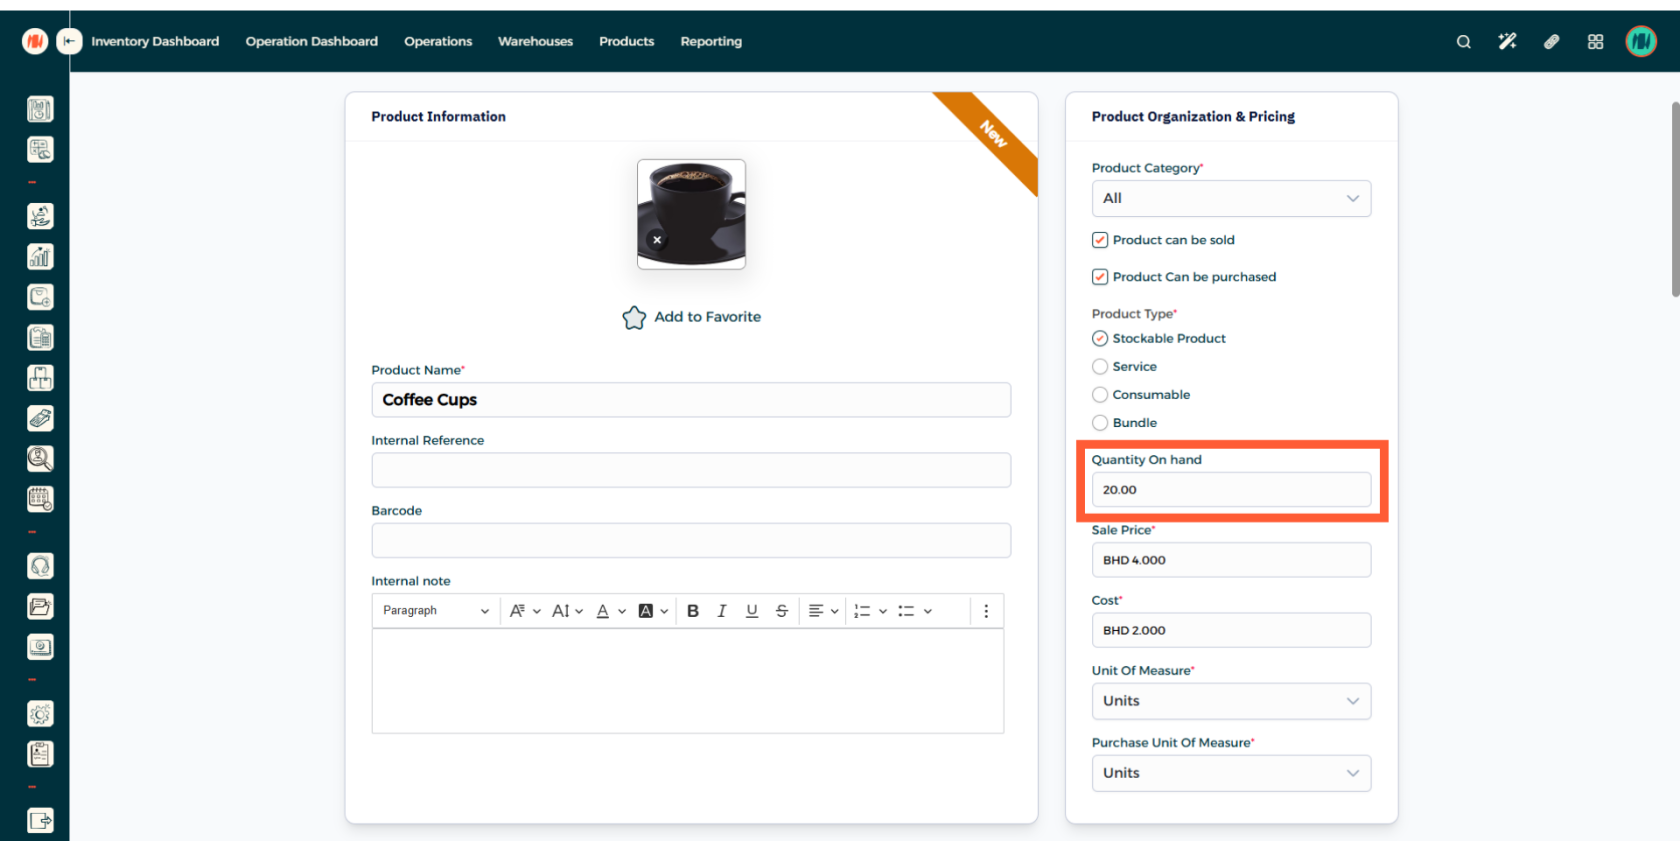
Step 7: Enter Quantity
Step 8: Create Product
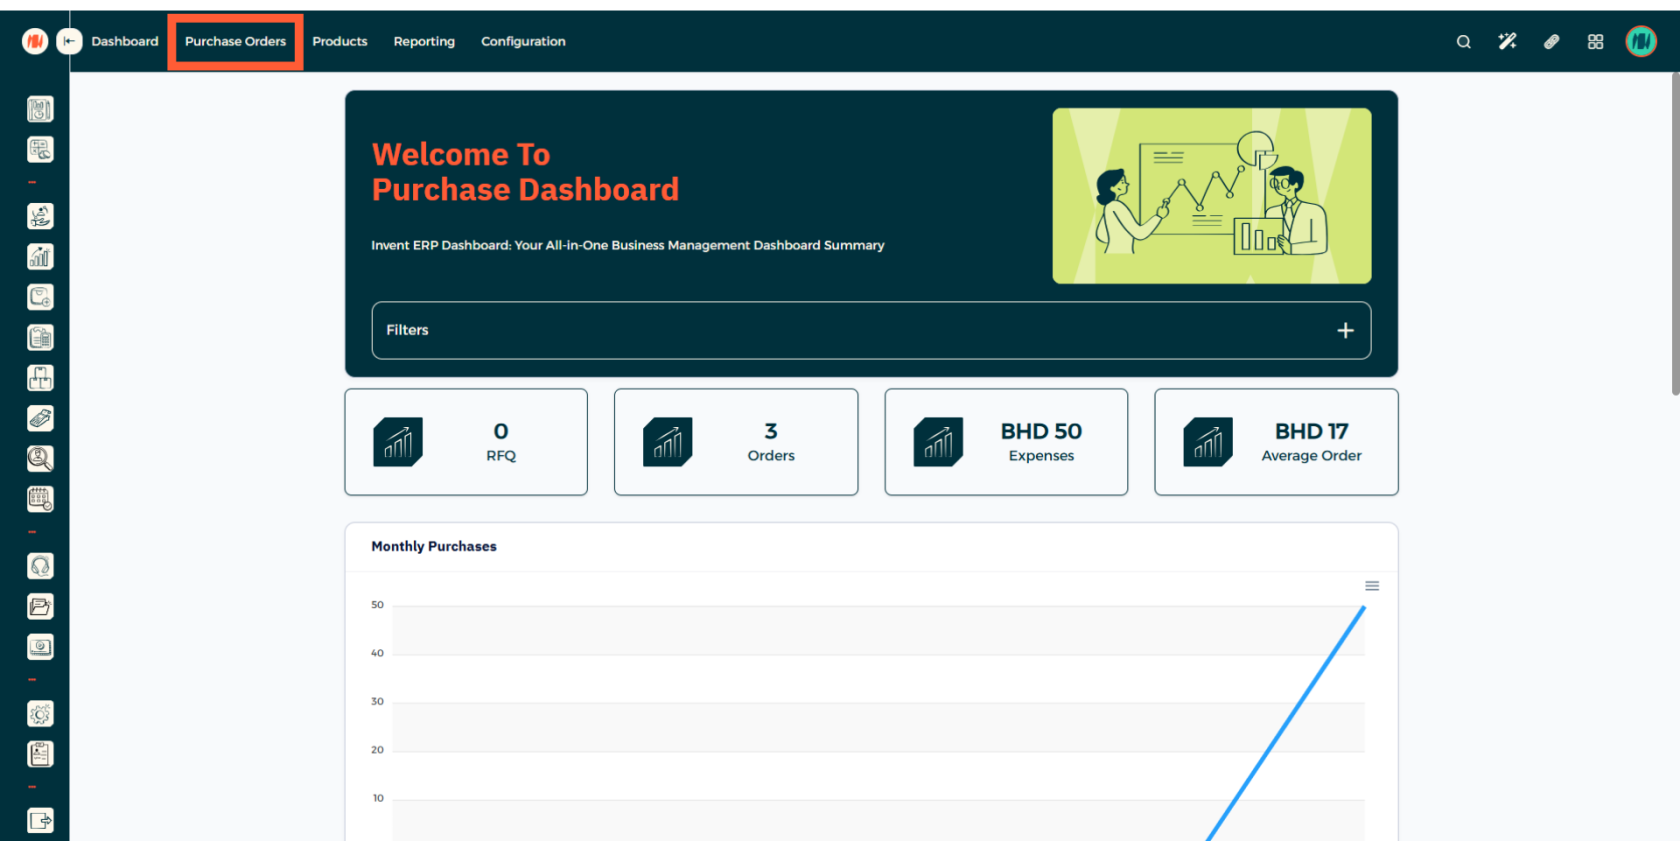
Step 9: Select Purchase Orders
After that is complete. In the top right click on all apps. Then go to your purchases module. You will arrive here, select purchase orders.
Step 10: Create Purchase Order
When you arrived to the purchase orders page, press on add in the top right corner and it will bring up this page, then simply begin filling out details.
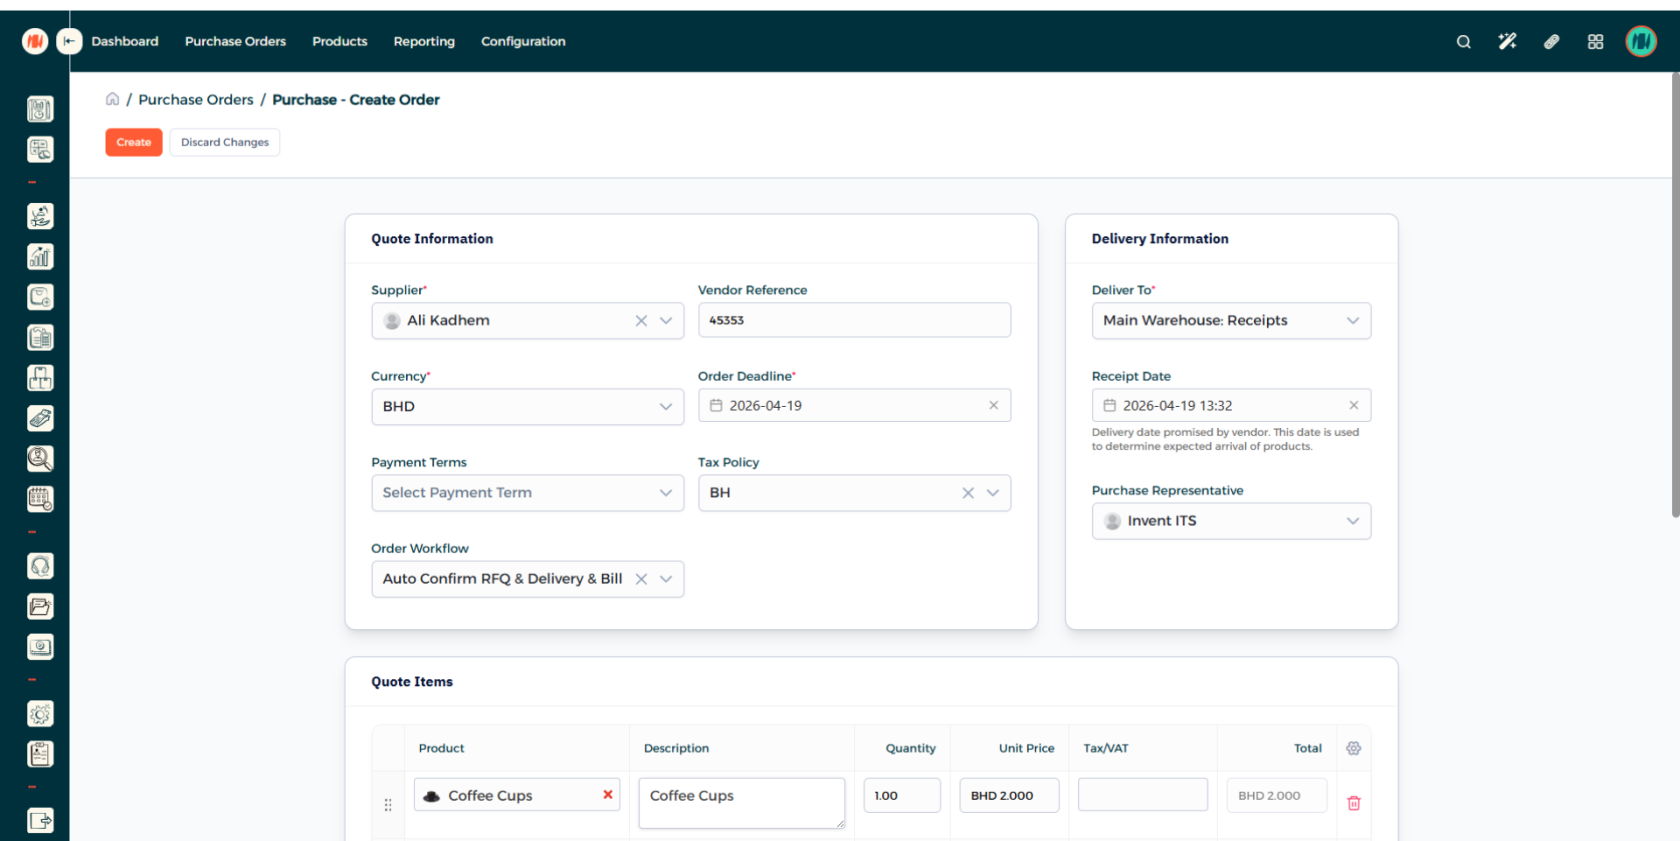
Step 11: Add Product to Purchase Order
Select the product. Alongside the quantity you want. Then go ahead and create your purchase order.
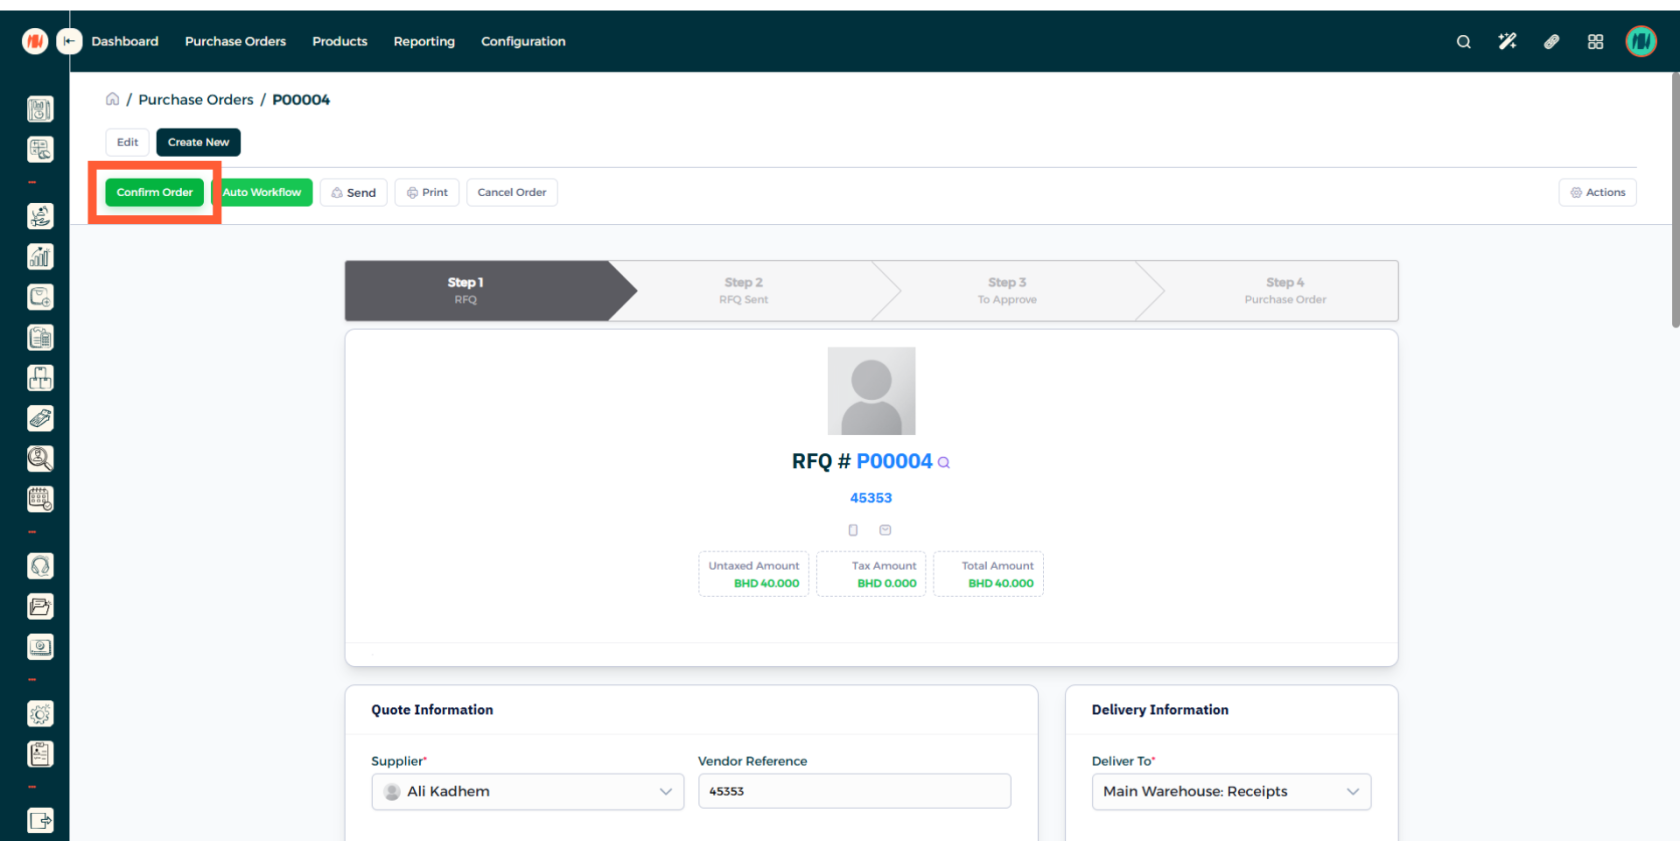
Step 12: Confirm Purchase Order
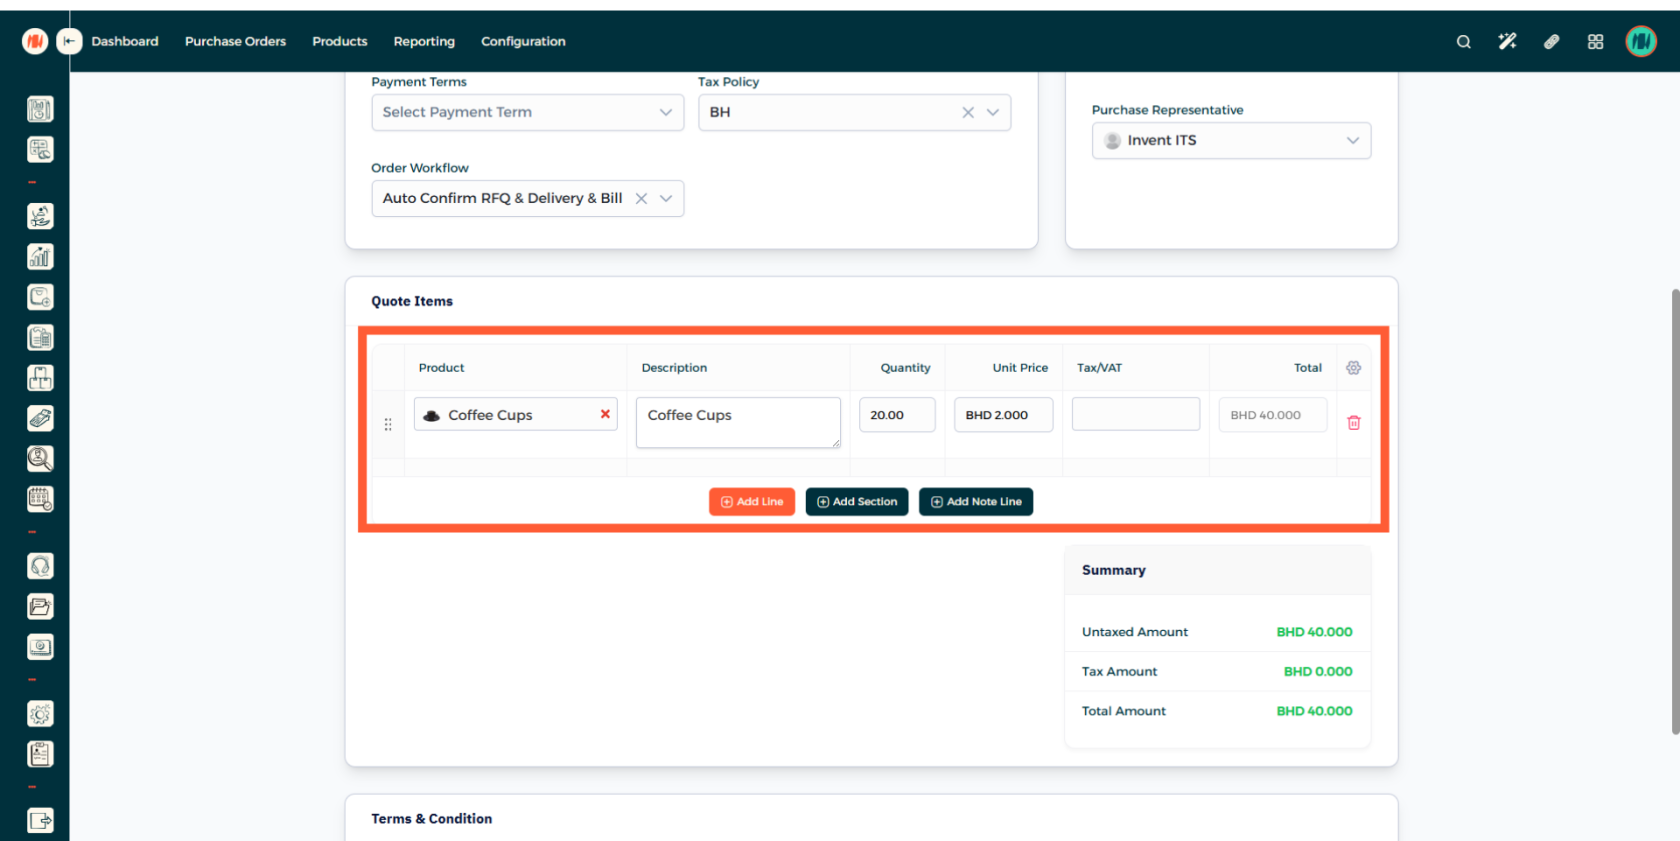
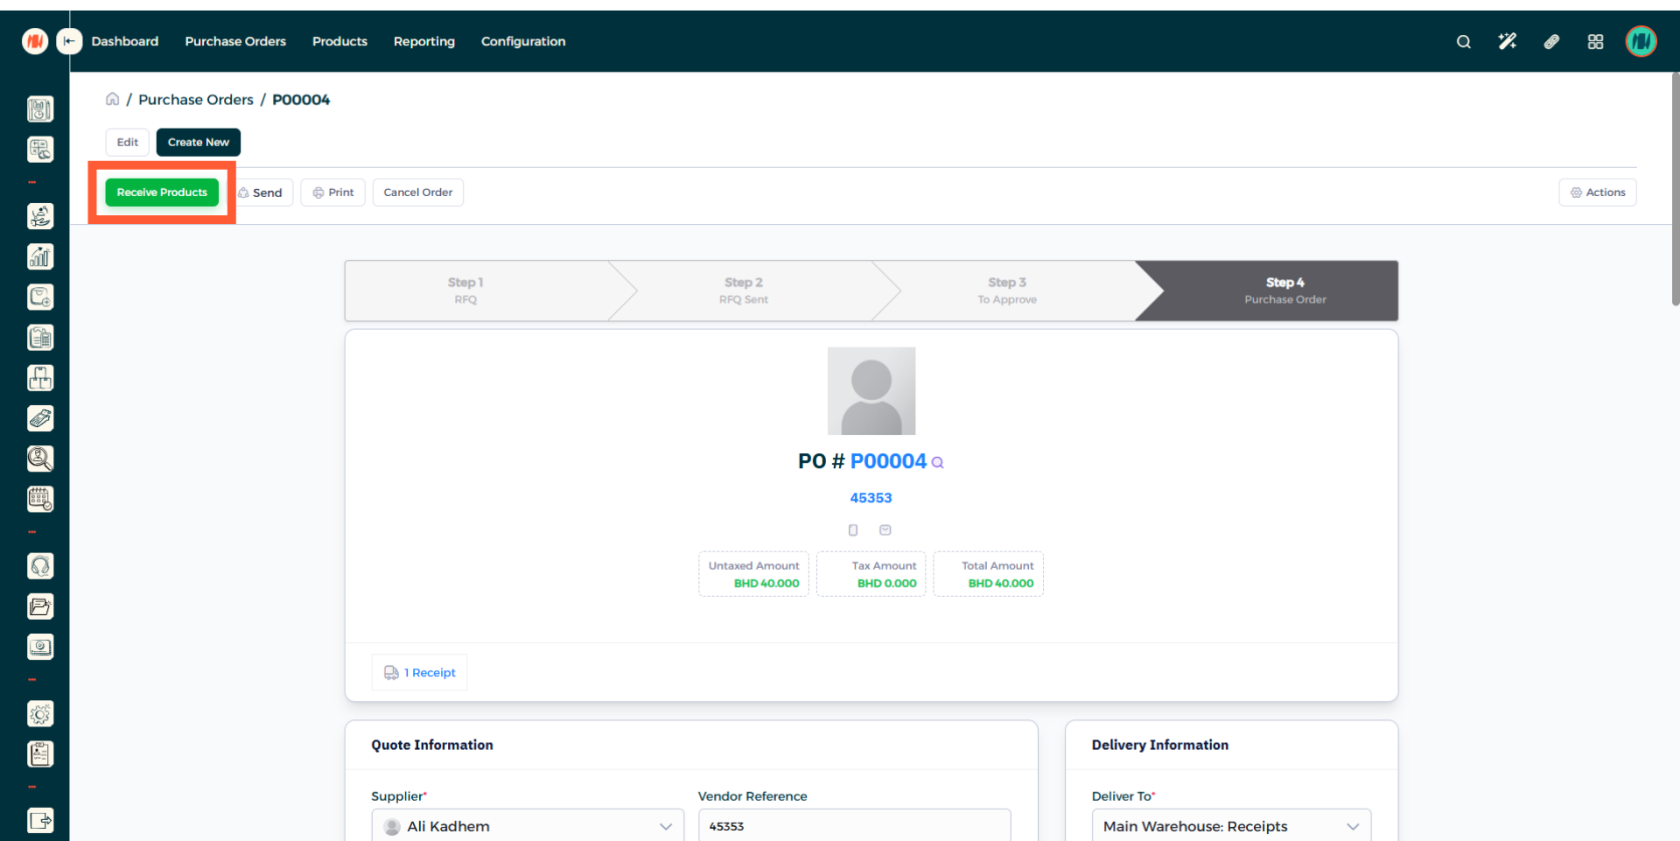
Step 13: Receive Products
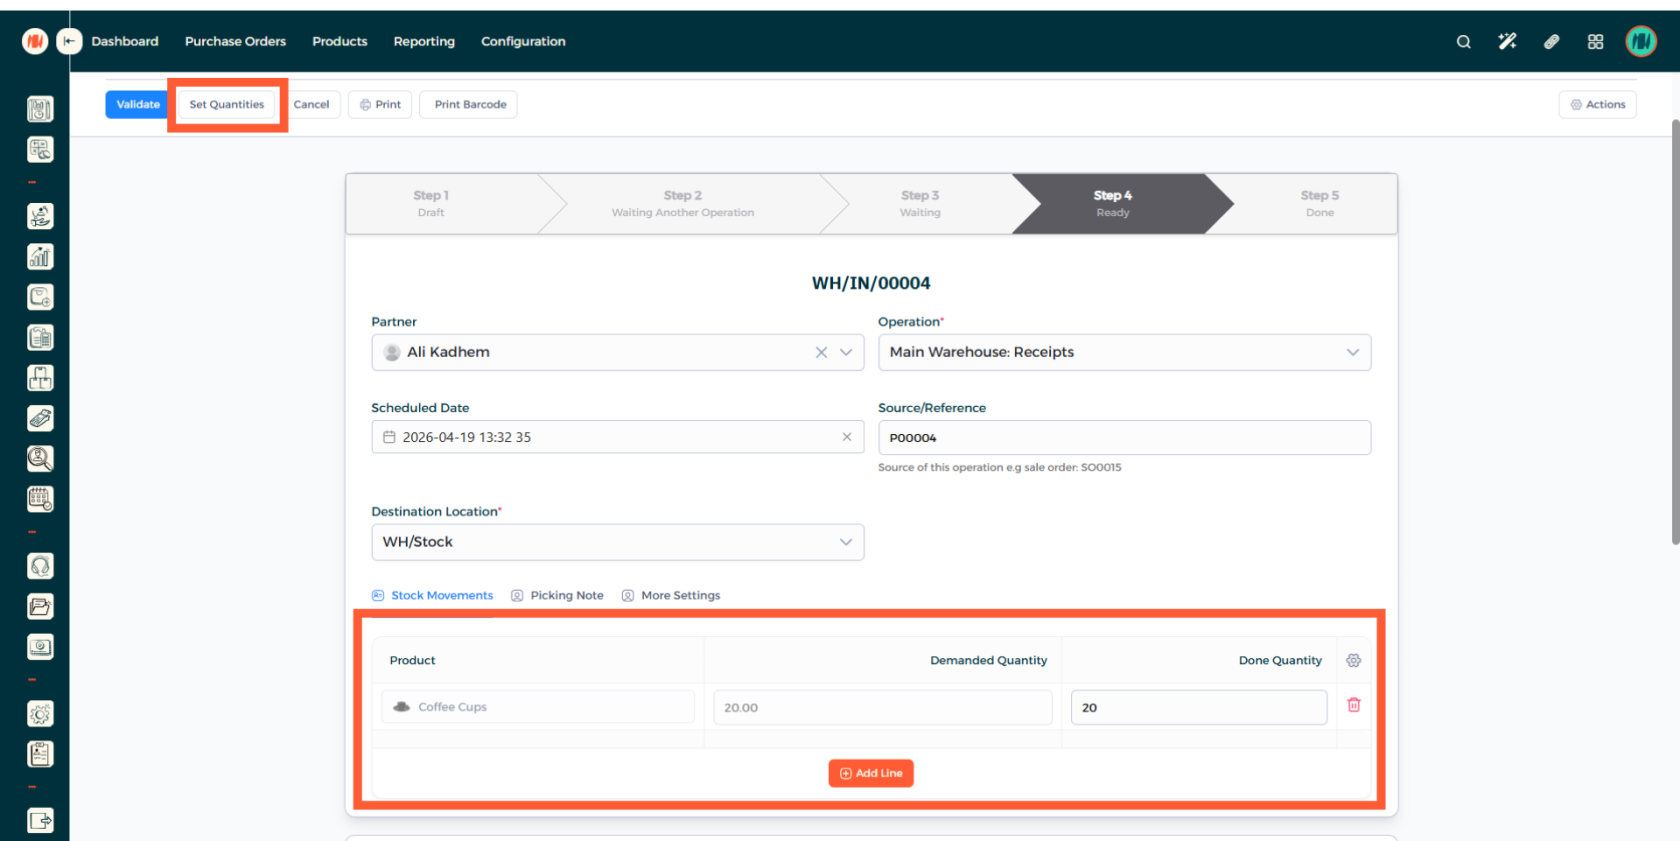
Step 14: Set Quantities then Validate
Make sure the demanded and done quantities match. When there is no difference and all is good, click on validate.
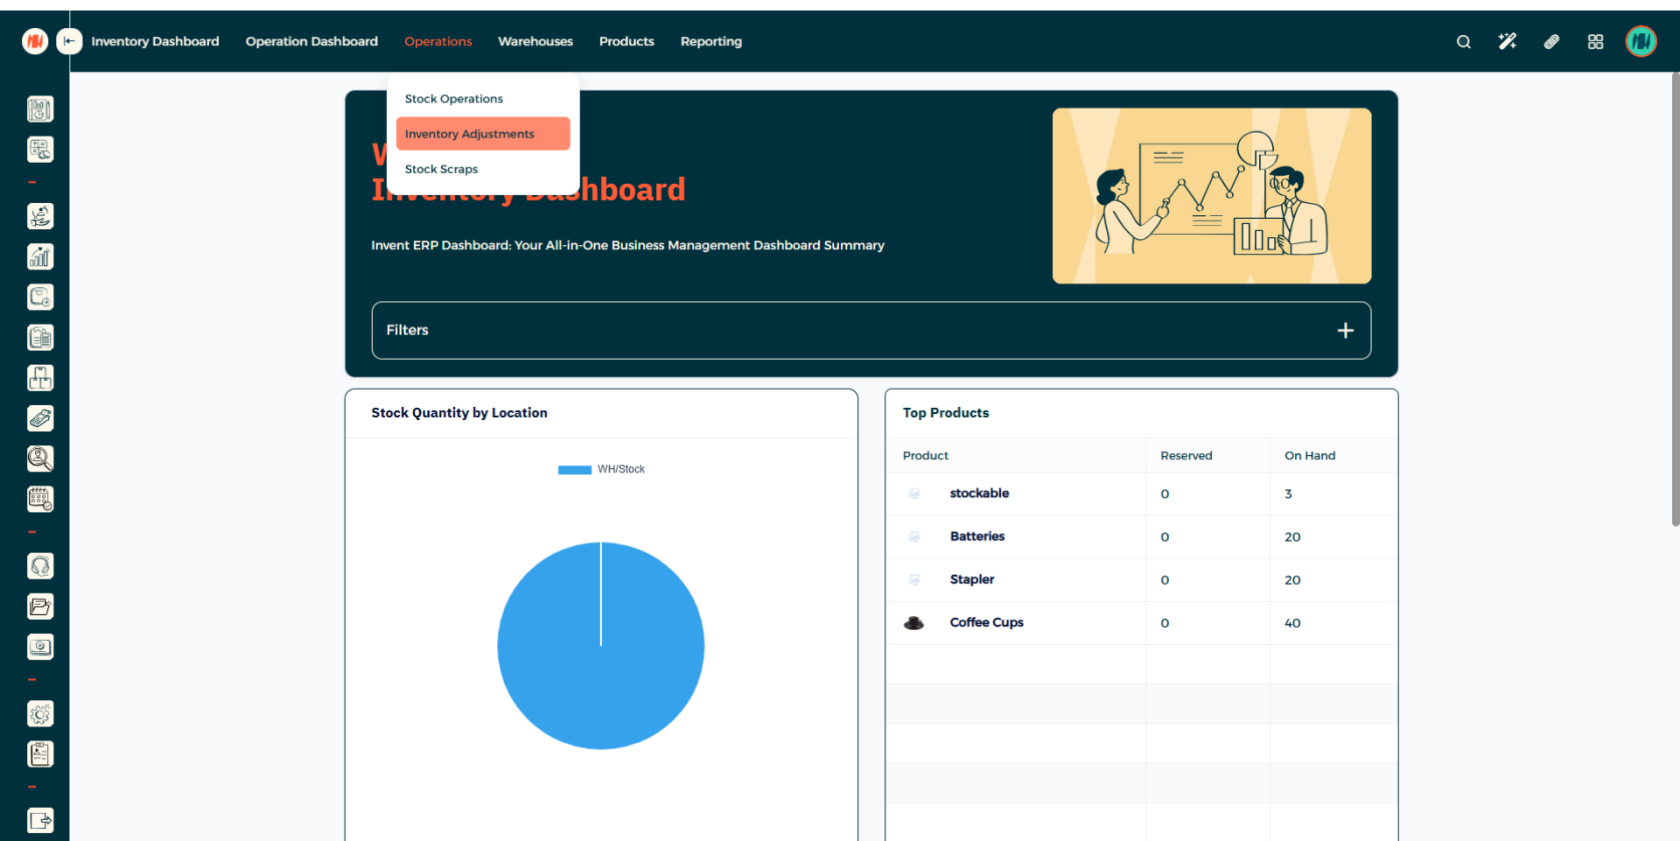
Step 15: Head to Inventory Adjustments
When that is done. Click on all apps in the top right corner. Then Select Inventory. You will arrive here, in the Inventory page. Select Operation then Inventory Adjustments.
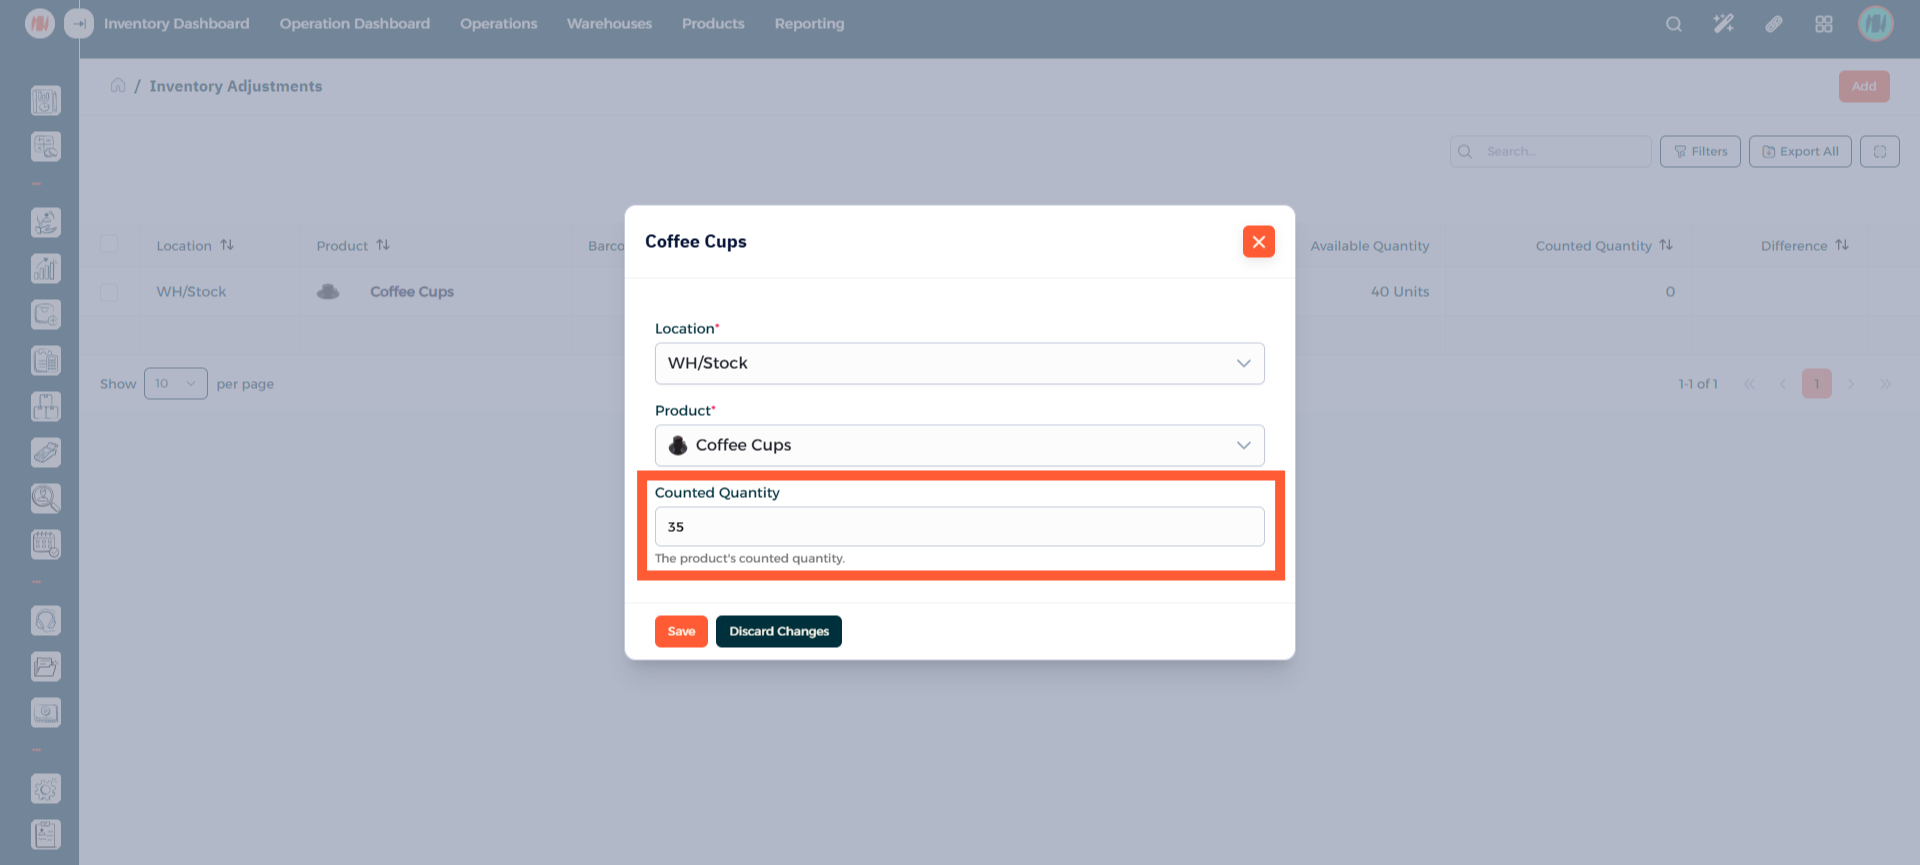
Step 16: Manually Adjust the Products
Select the product to add a quantity. Add the counted quantity of the product. After that, press Save.
Step 17: Apply Adjustment
Apply the difference to ensure all products are accounted for. Then that's it!

Notes & Tips
- Always double check counts for large or high-value adjustments to prevent errors or further issues in the future.
- Choose the right unit of measure to ensure the unit matches how you stock and sell the products. When an inappropriate measure is used it can cause incorrect quantities, pricing errors, and reconciliation issues.
FAQ
Q: What products do I add? Add any product that is relevant to your business and has the appropriate unit of measure.
Q: How do I know I have missing products? Check the difference between the order quantity and counted quantity in the inventory adjustments page to see if you have any missing products