How to Manage Invoices, Payments, and Financial Records in Invent Medical
Learn how to bill procedures, create and confirm invoices, register and allocate payments, sell service packages, set up payment plans, issue credit notes, transfer funds between patients, and review financial standing in the Medical Billing module.
Module Overview & Layout
The Medical Billing module is where front-desk and billing teams turn completed procedures into revenue — all within Invent Medical. From a single patient's billing screen, staff can invoice, collect and allocate payments, sell packages, arrange payment plans, issue credit notes, move funds between accounts, and check outstanding balances, with VAT handled automatically for GCC compliance.
When you open a patient's Billing screen, you'll typically see:
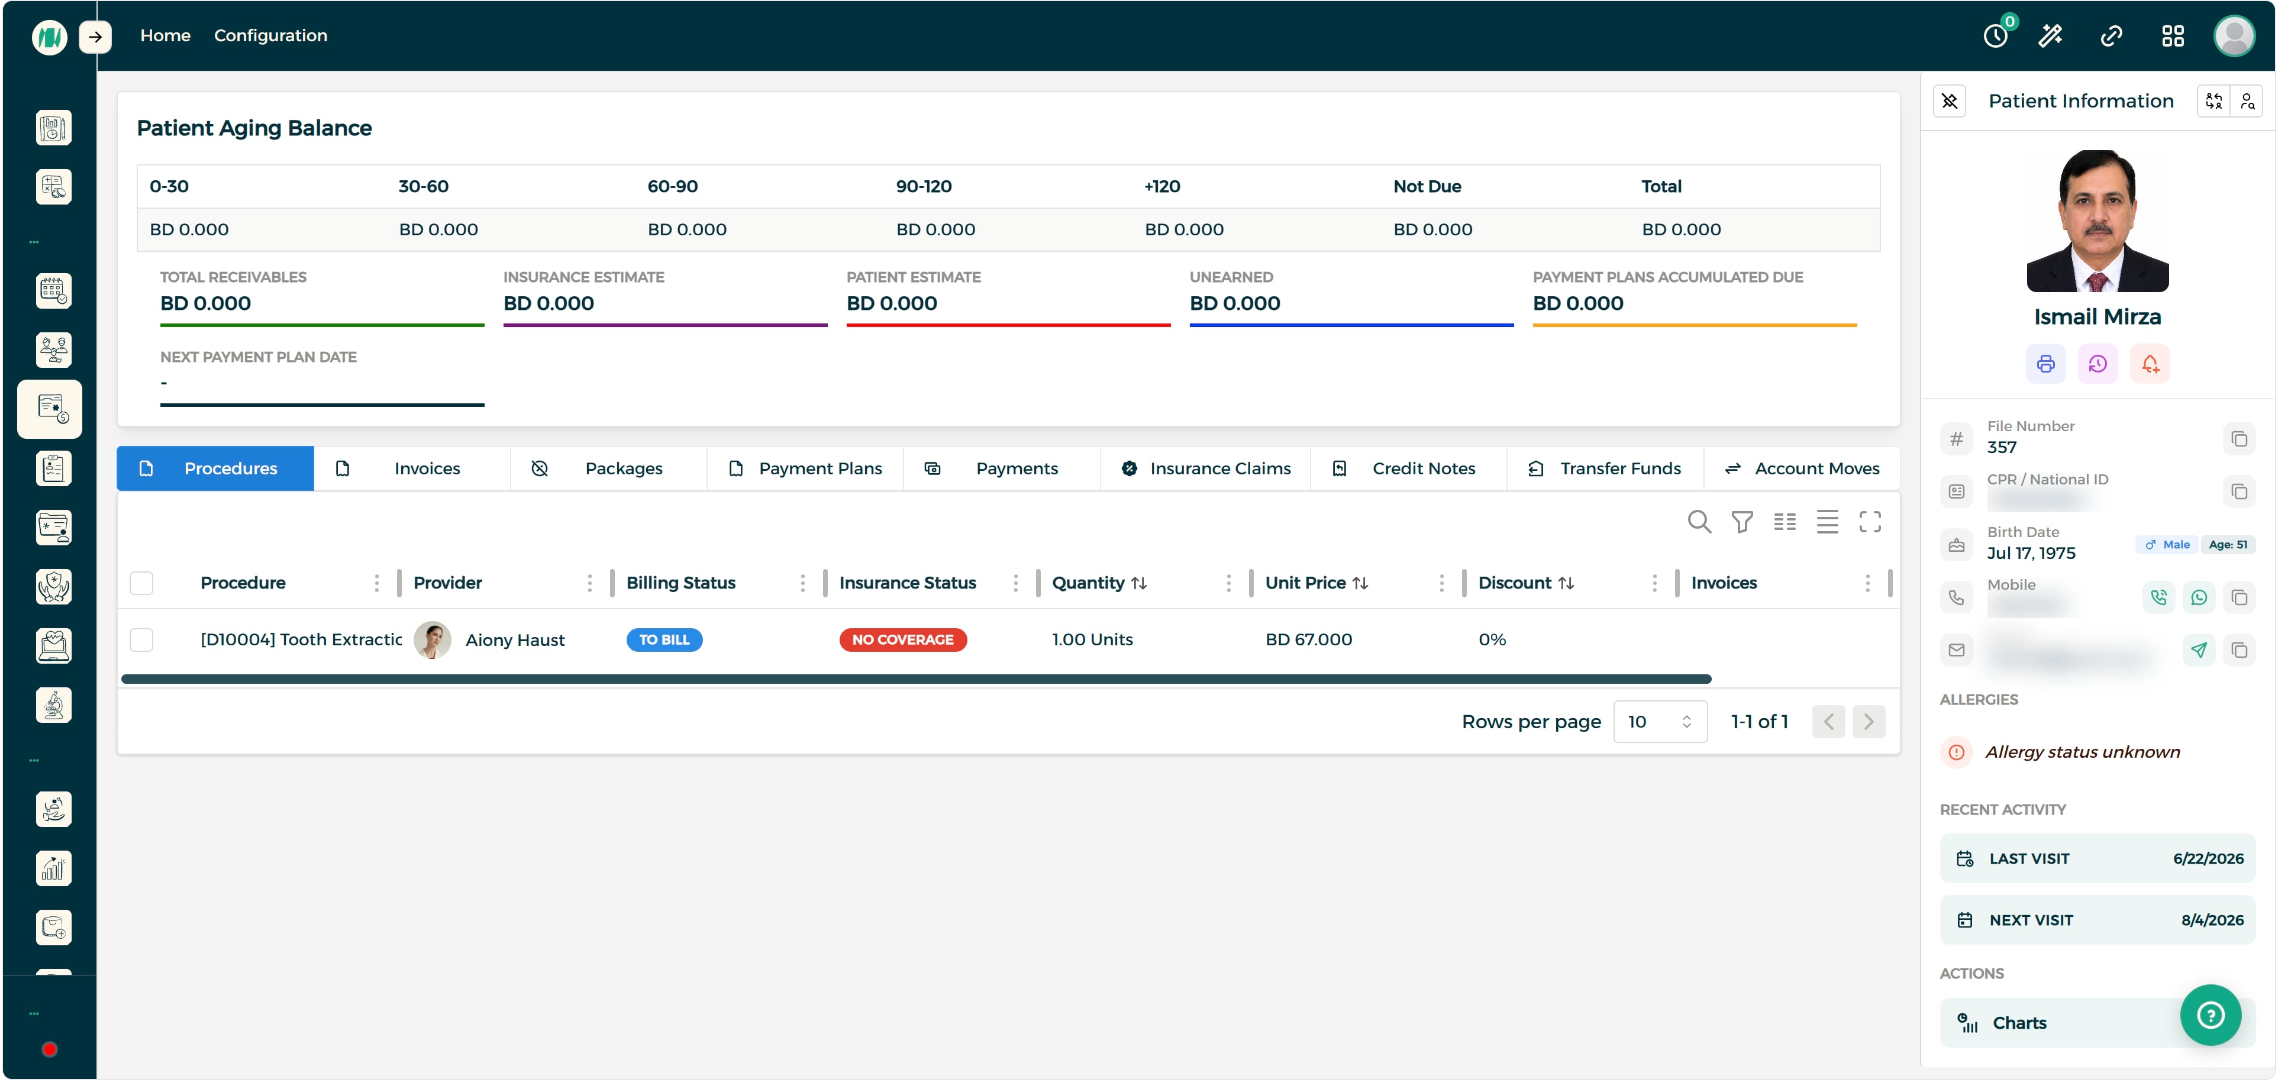
- Tab bar — switch between Procedures, Invoices, Packages, Payment Plans, Payments, Insurance Claims, Credit Notes, Transfer Funds, and Account Moves
- Procedures tab — every procedure sent to billing for that patient, ready to be invoiced
- Summary panels — totals, taxes, unearned balances, and aging receivables at a glance
- Add New / action buttons — Create a new invoice, payment, package, payment plan, credit note, or transfer directly from the relevant tab
Each tab is self-contained — you can move between invoicing, payments, and financial tracking for the same patient without leaving the billing screen.
Step-by-Step Process
Invoicing Procedures
Step 1: View Procedures Ready for Billing
Open the Procedures tab to see every procedure that's been sent to billing for this patient.
Step 2: Select Procedures & Create a Draft Invoice
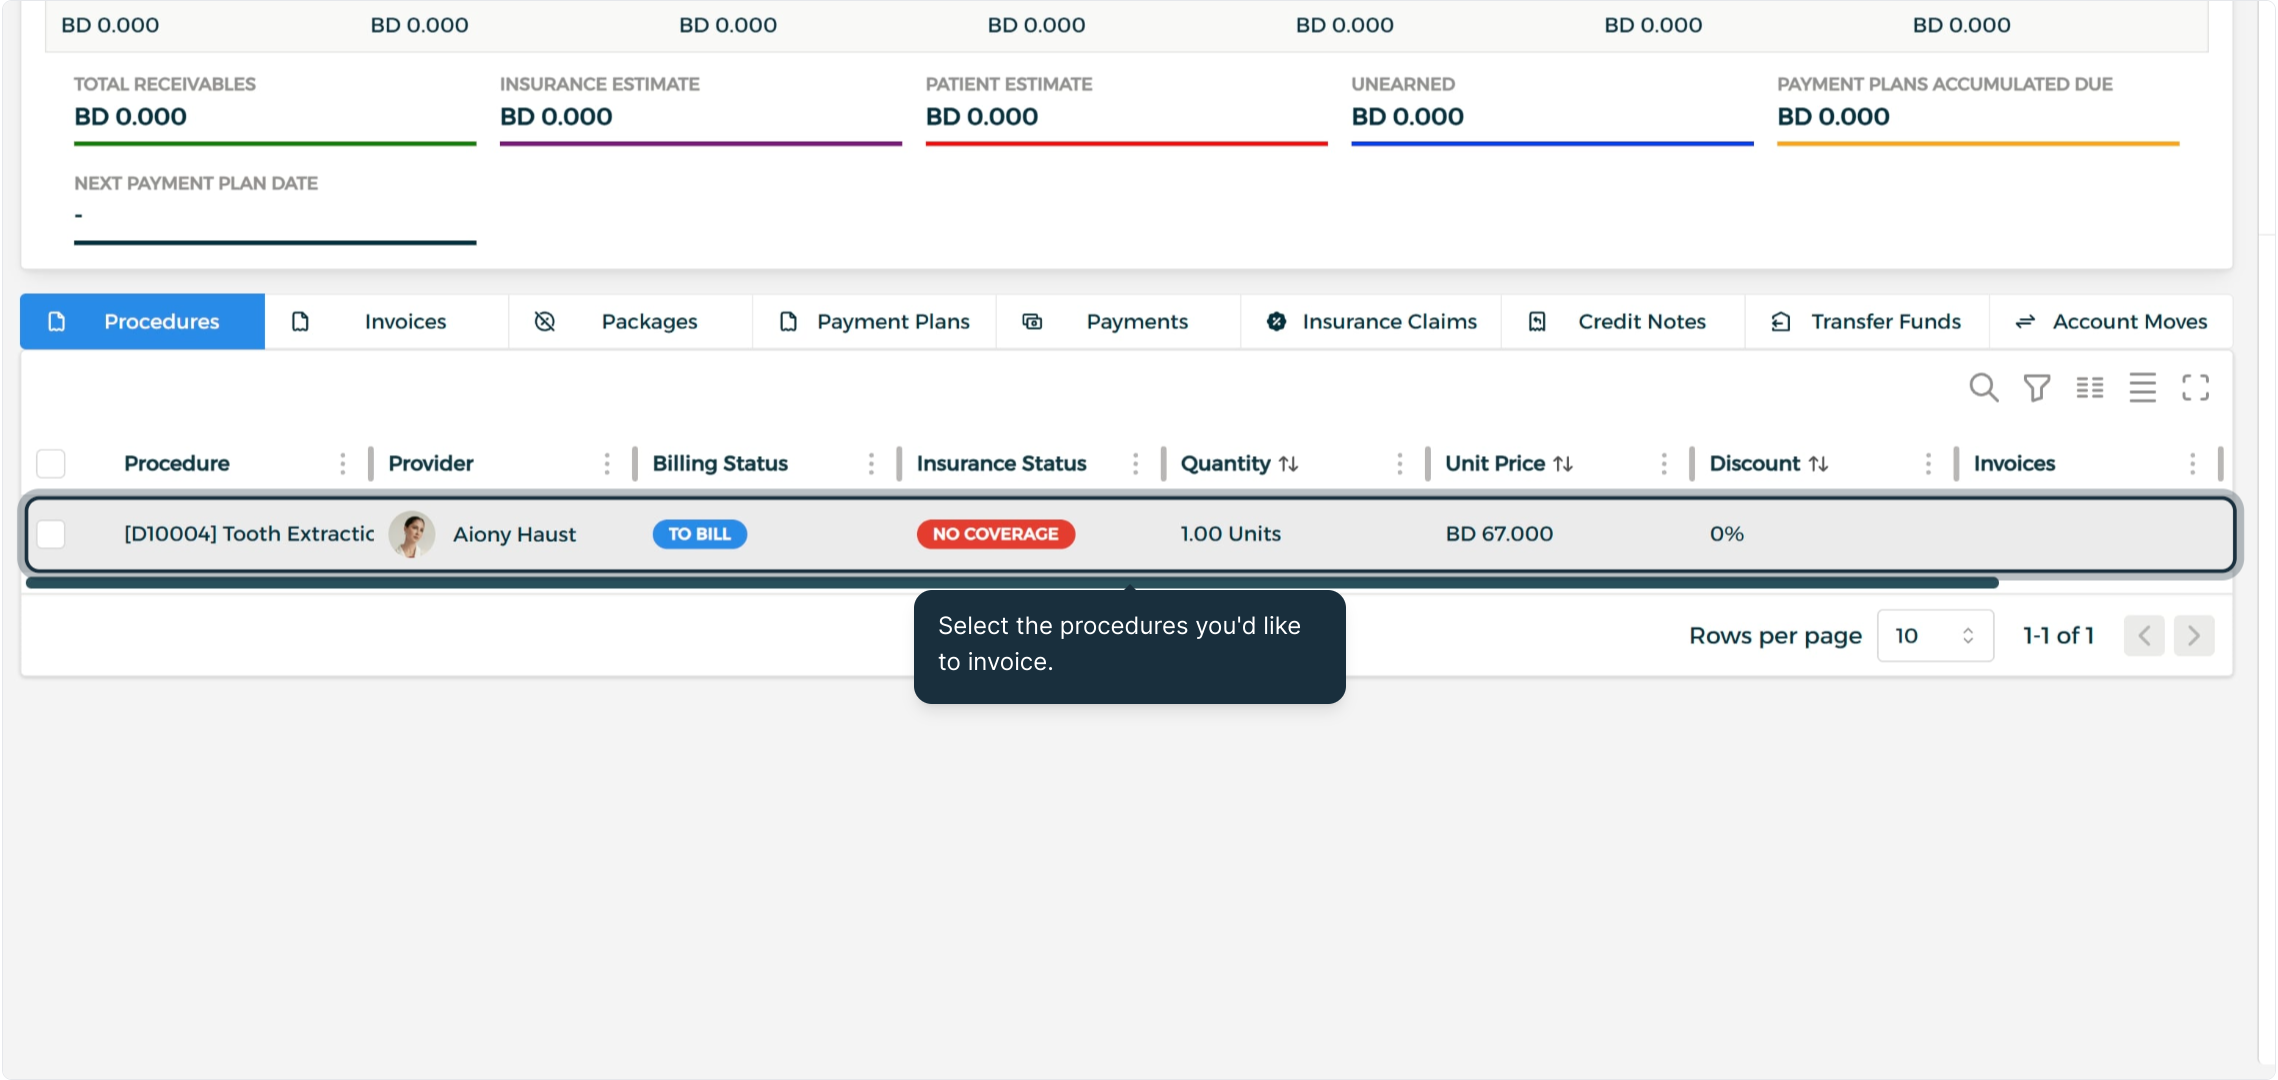
Select the procedures you'd like to invoice, then click Create Draft Invoice to generate a draft from your selection.
Step 3: Open an Invoice
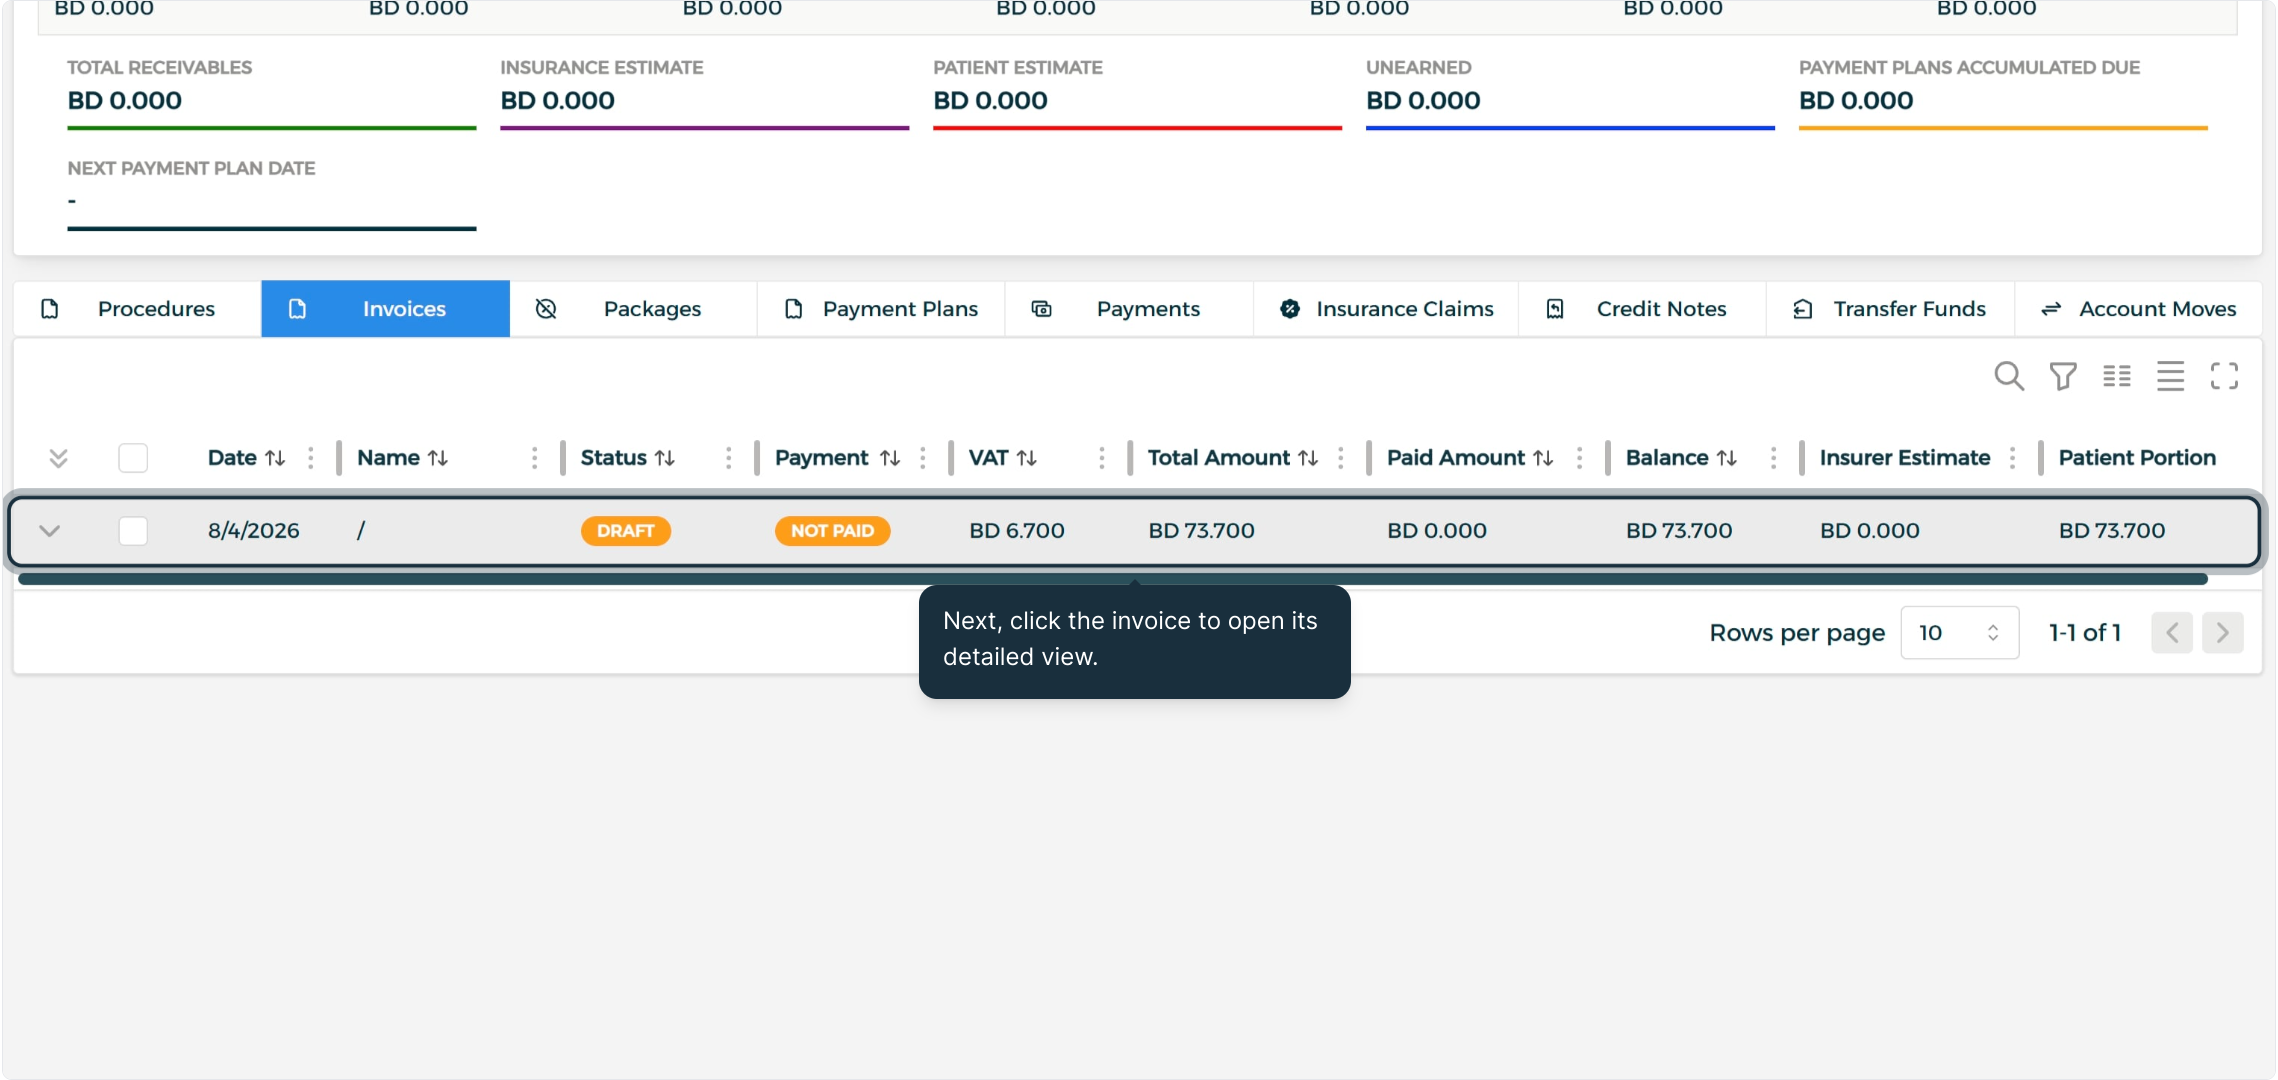
Switch to the Invoices tab and click the invoice to open its detailed view, showing all line items and totals.
Step 4: Adjust or Expand Invoice Line Items
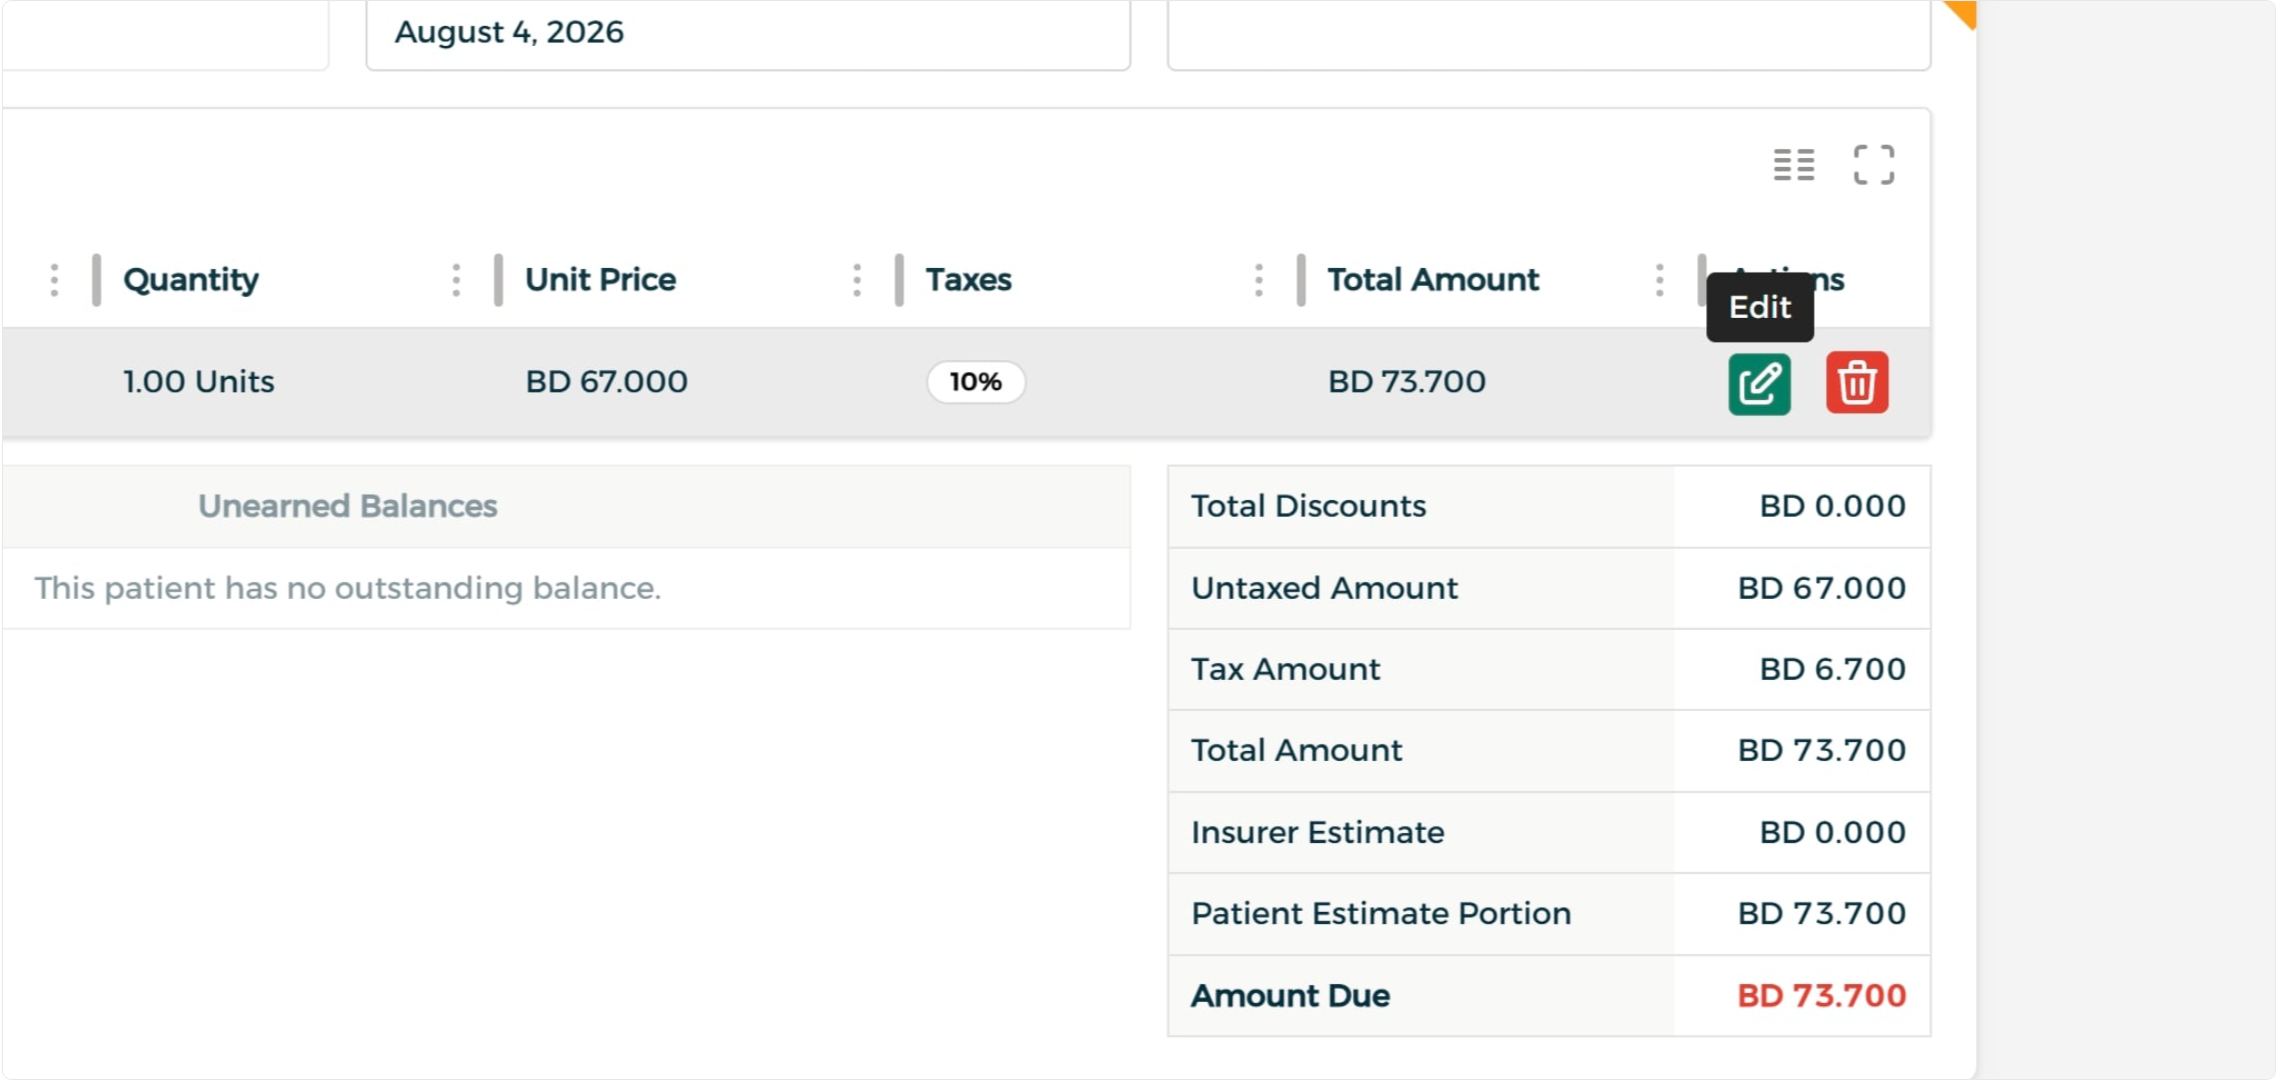
Use the edit icon to adjust a procedure's details, or add another procedure to the invoice if extra items need to be billed.
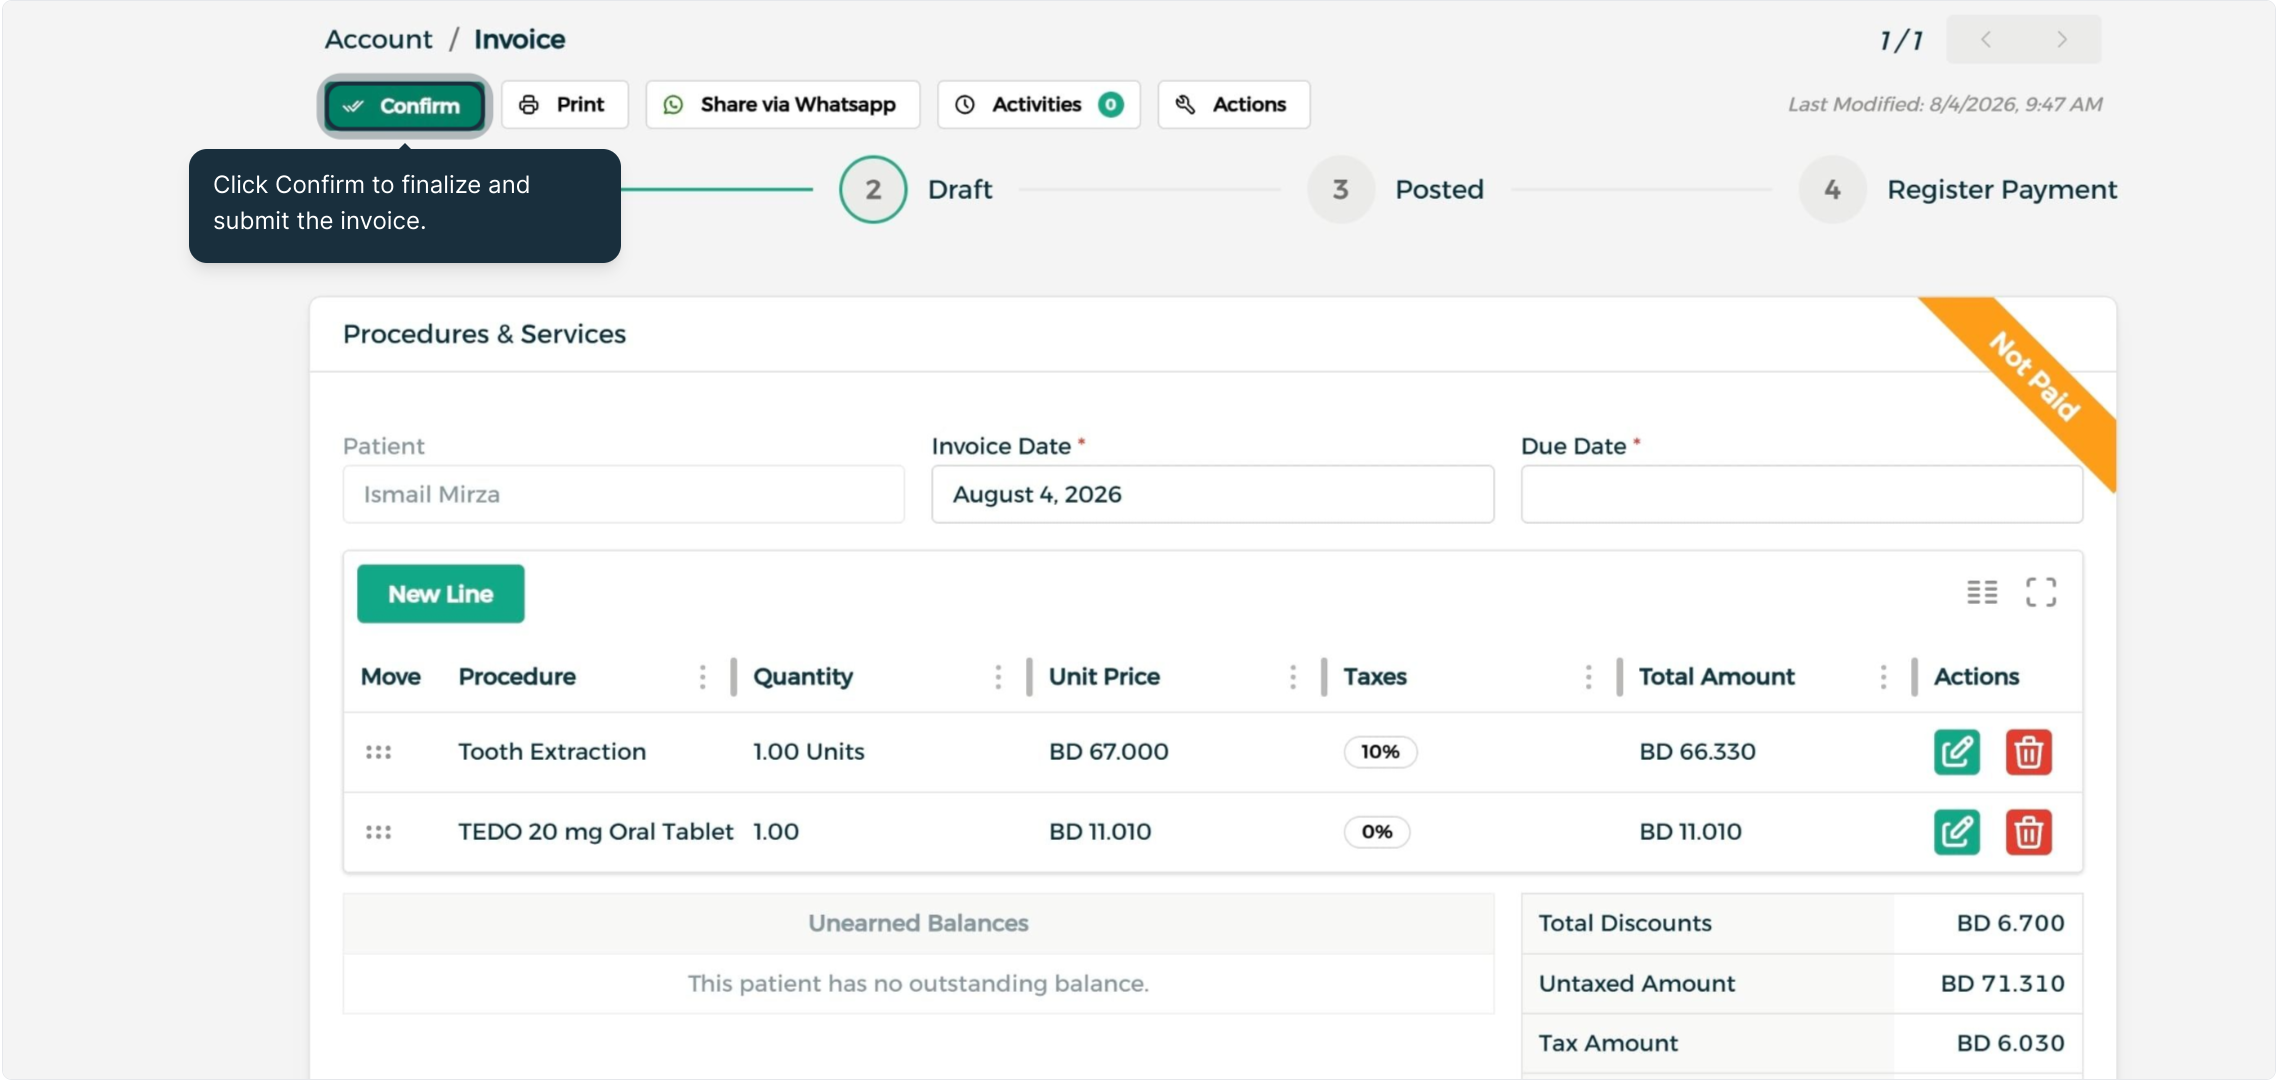
Step 5: Confirm the Invoice
Once everything looks correct, click Confirm to finalize and submit the invoice.
Payments & Allocations
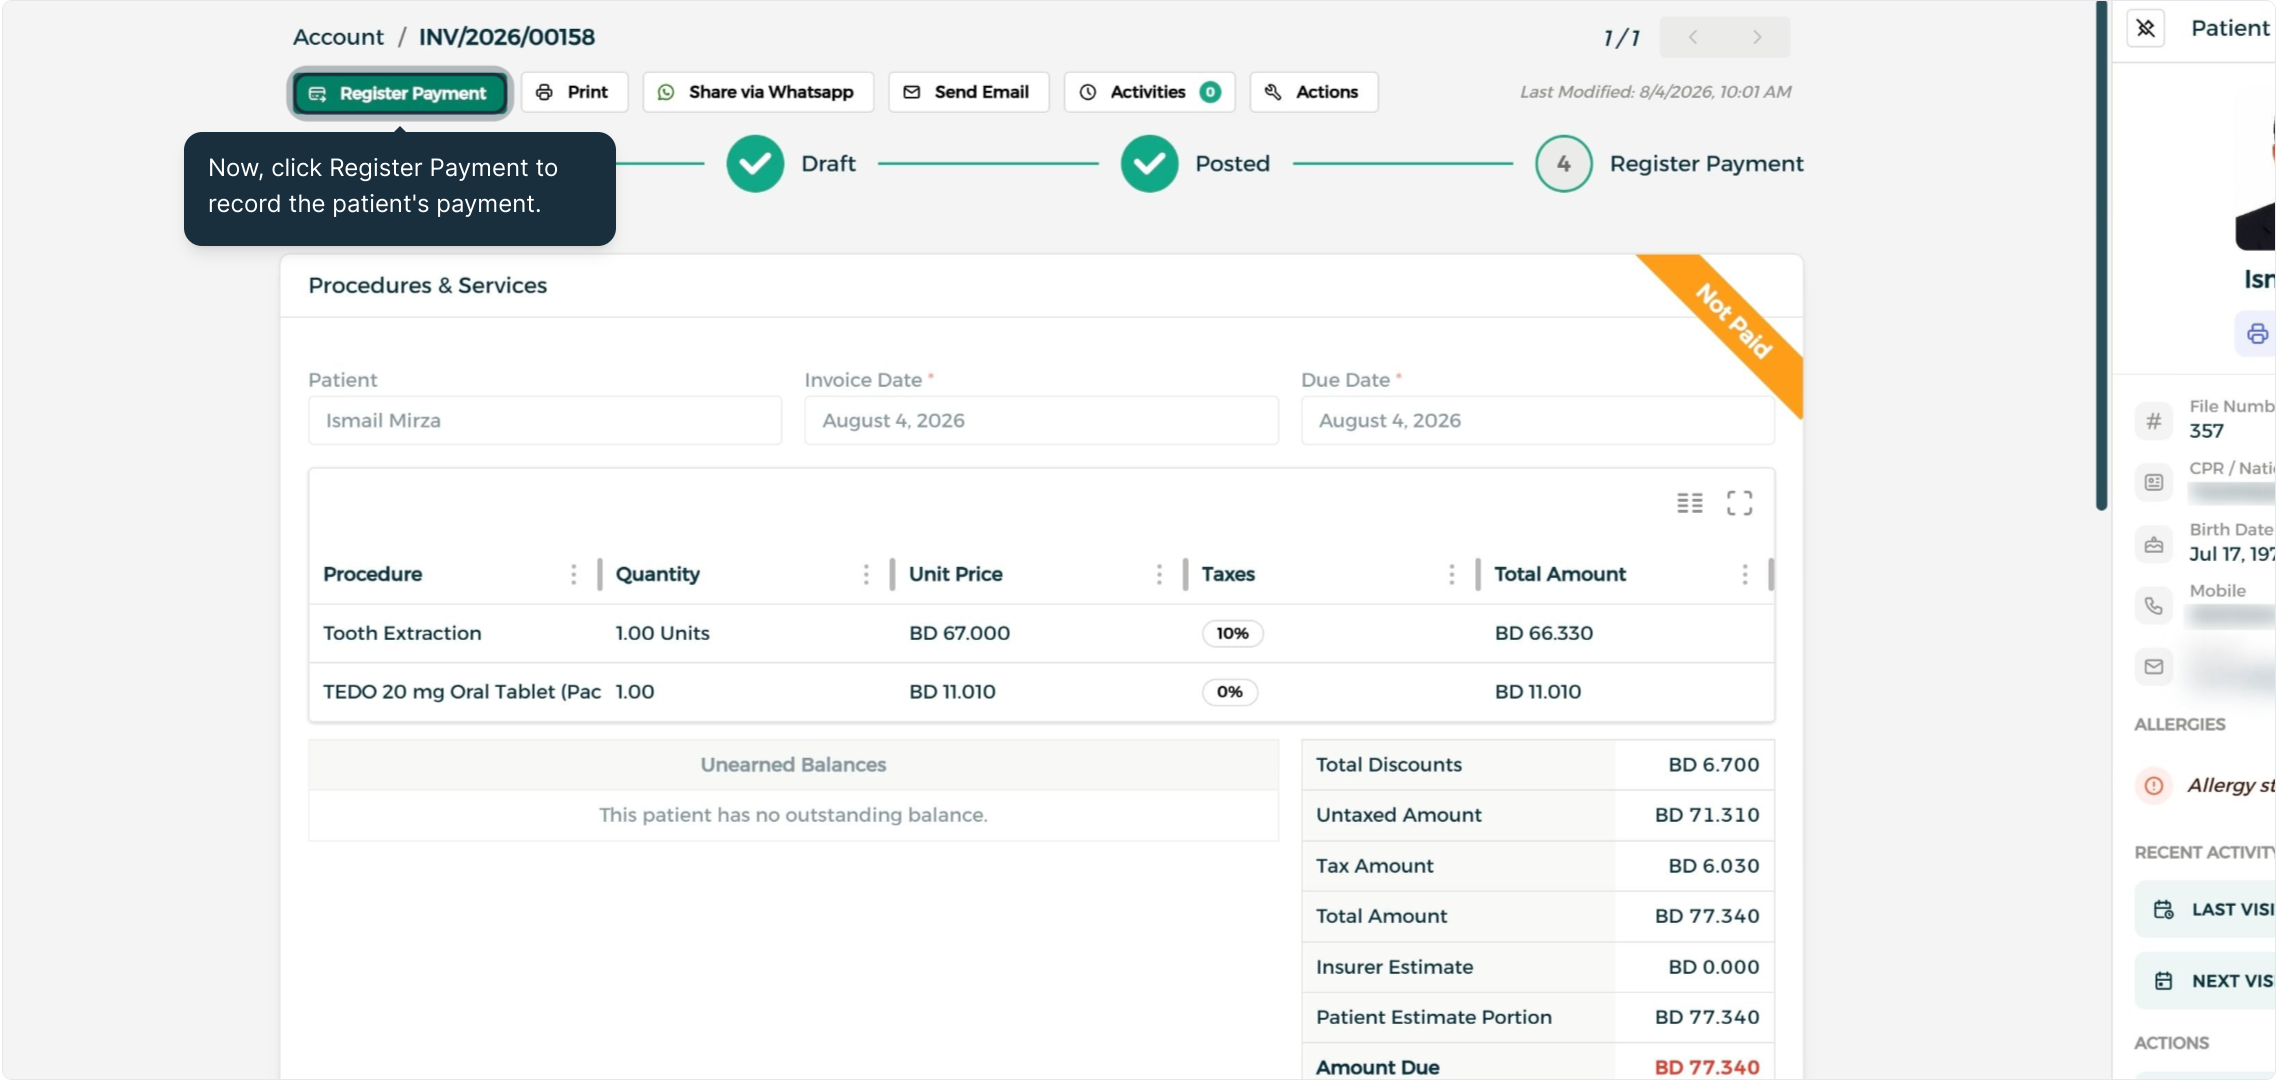
Step 1: Register a Payment
Click Register Payment to record the patient's payment, then confirm the payment details to complete the registration.
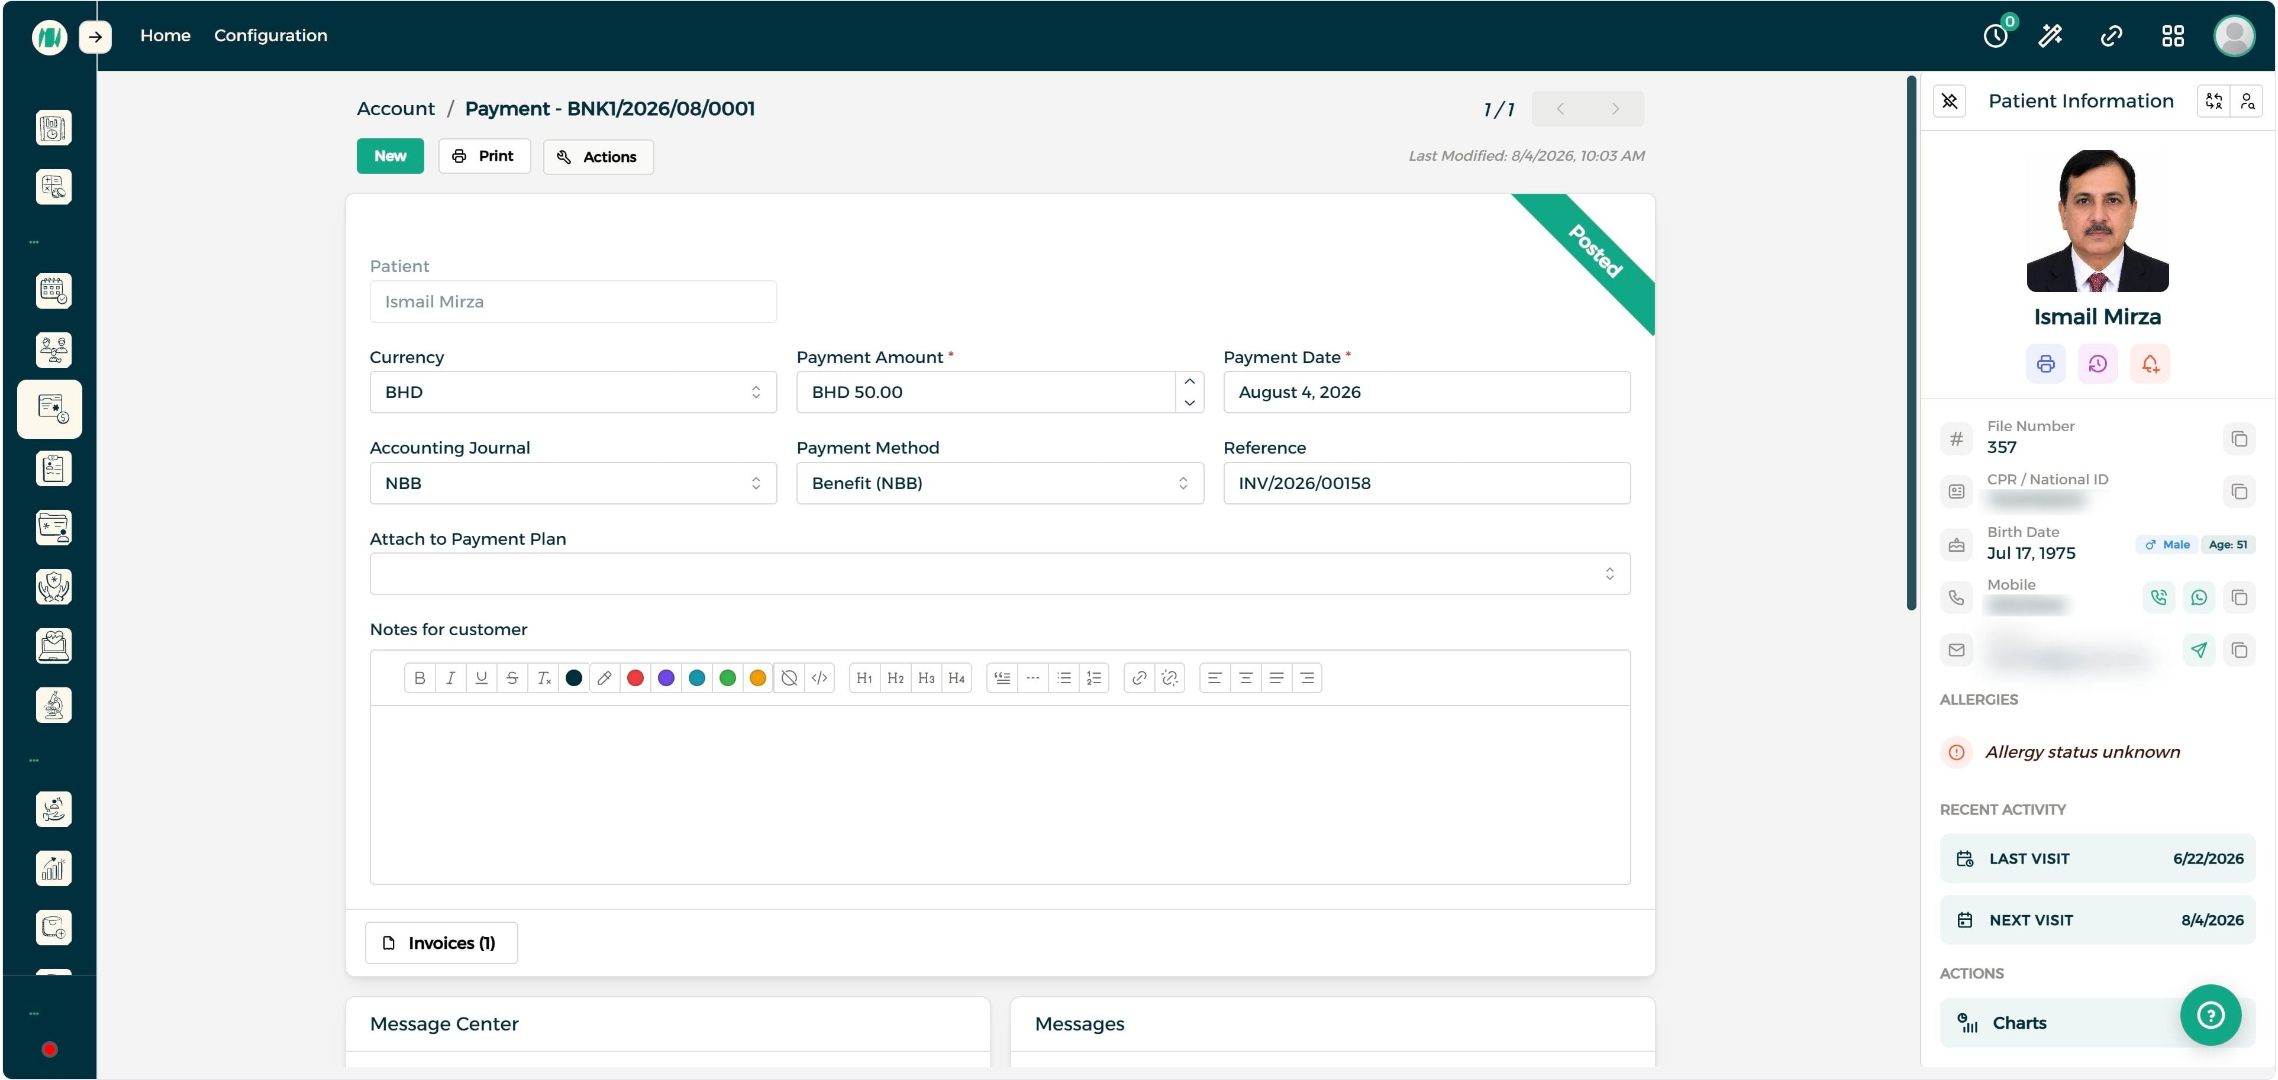
Step 2: View Payment Details
Open the Payments tab and click on a payment to see its full details, or update them as needed.
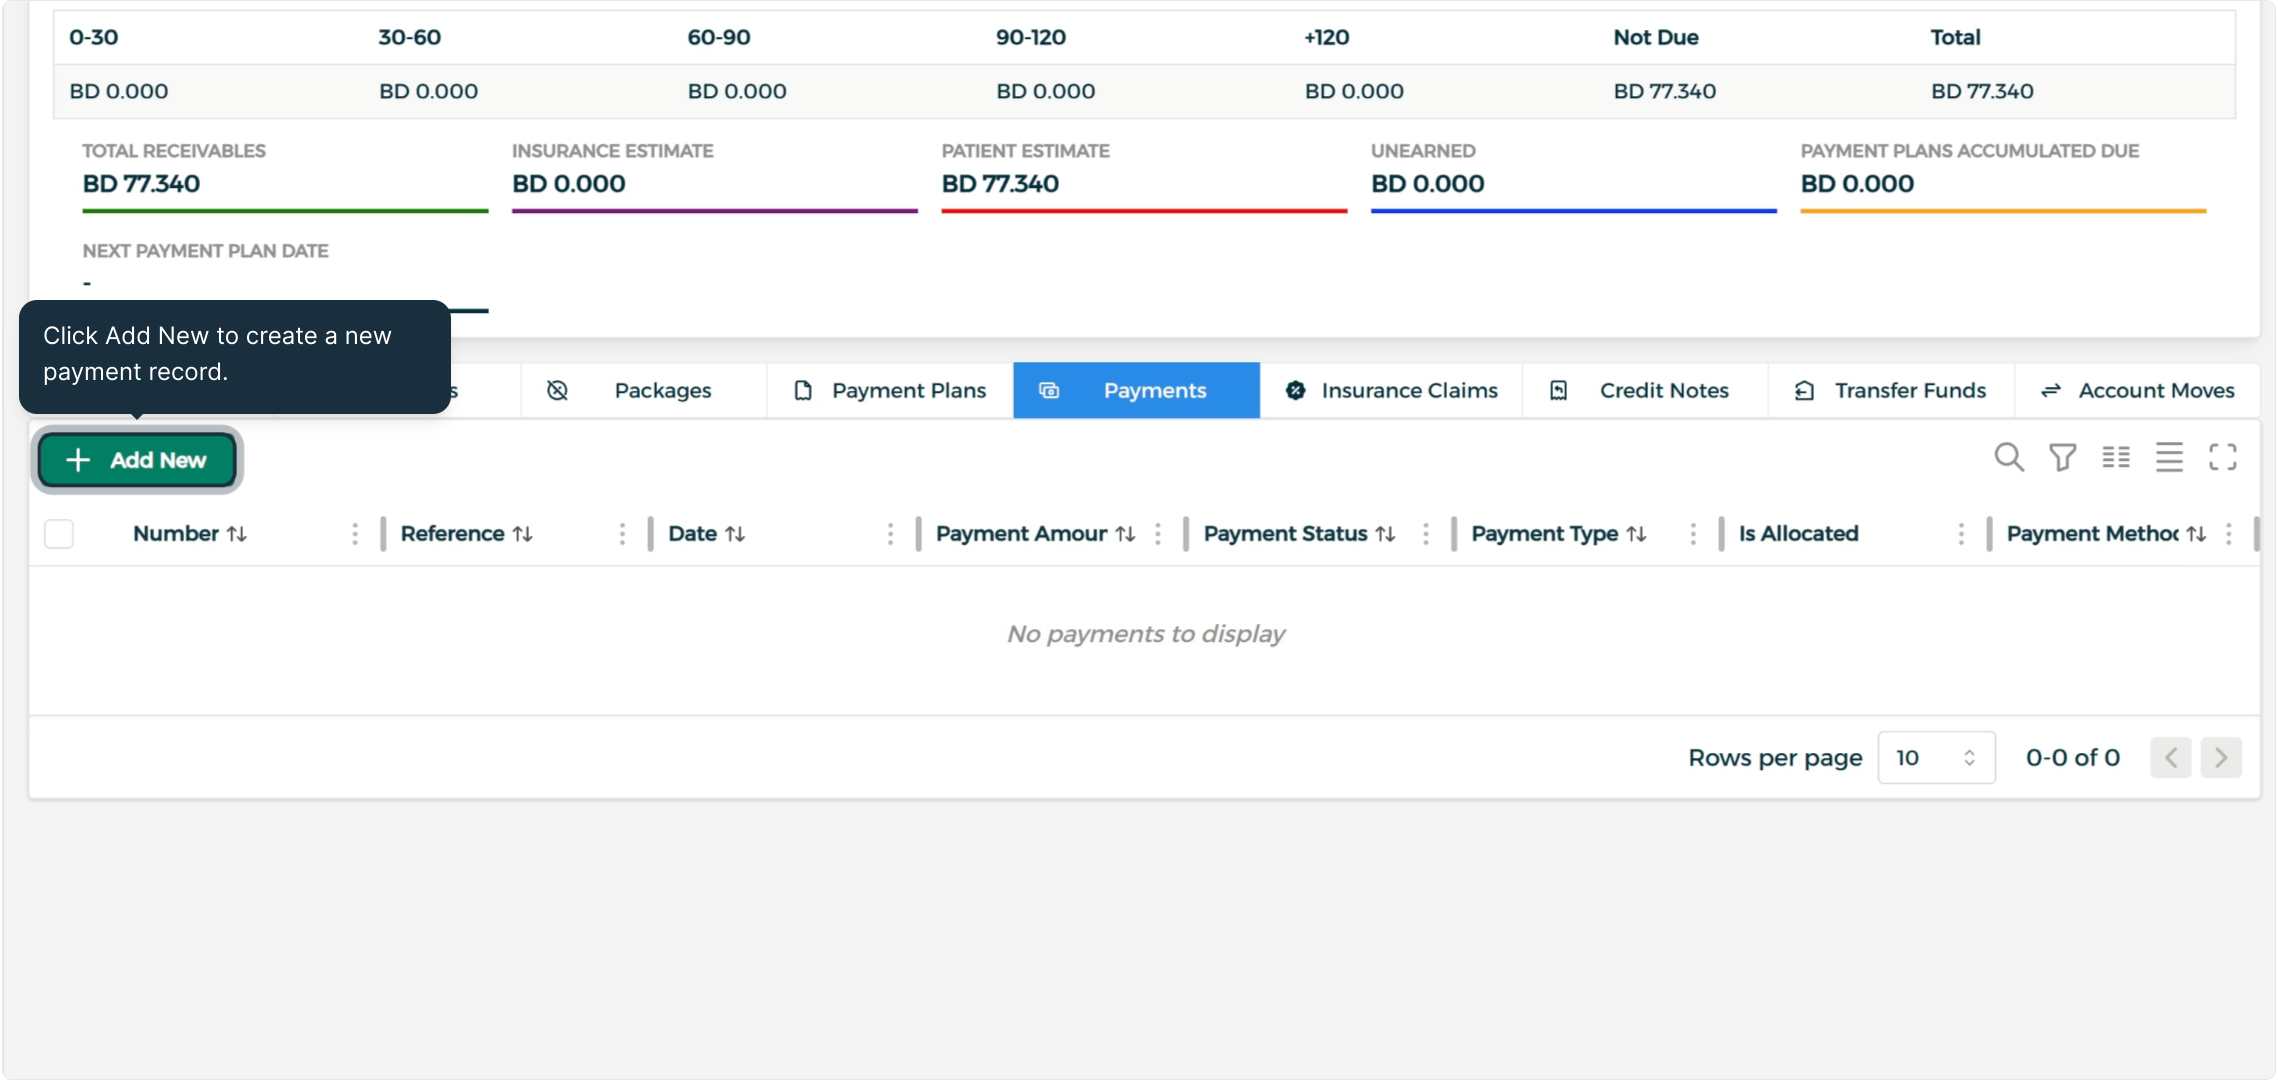
Step 3: Add a New Payment
Click Add New from the Payments tab, then enter the payment amount and date. Once every field is filled in, hit Save to lock it in.
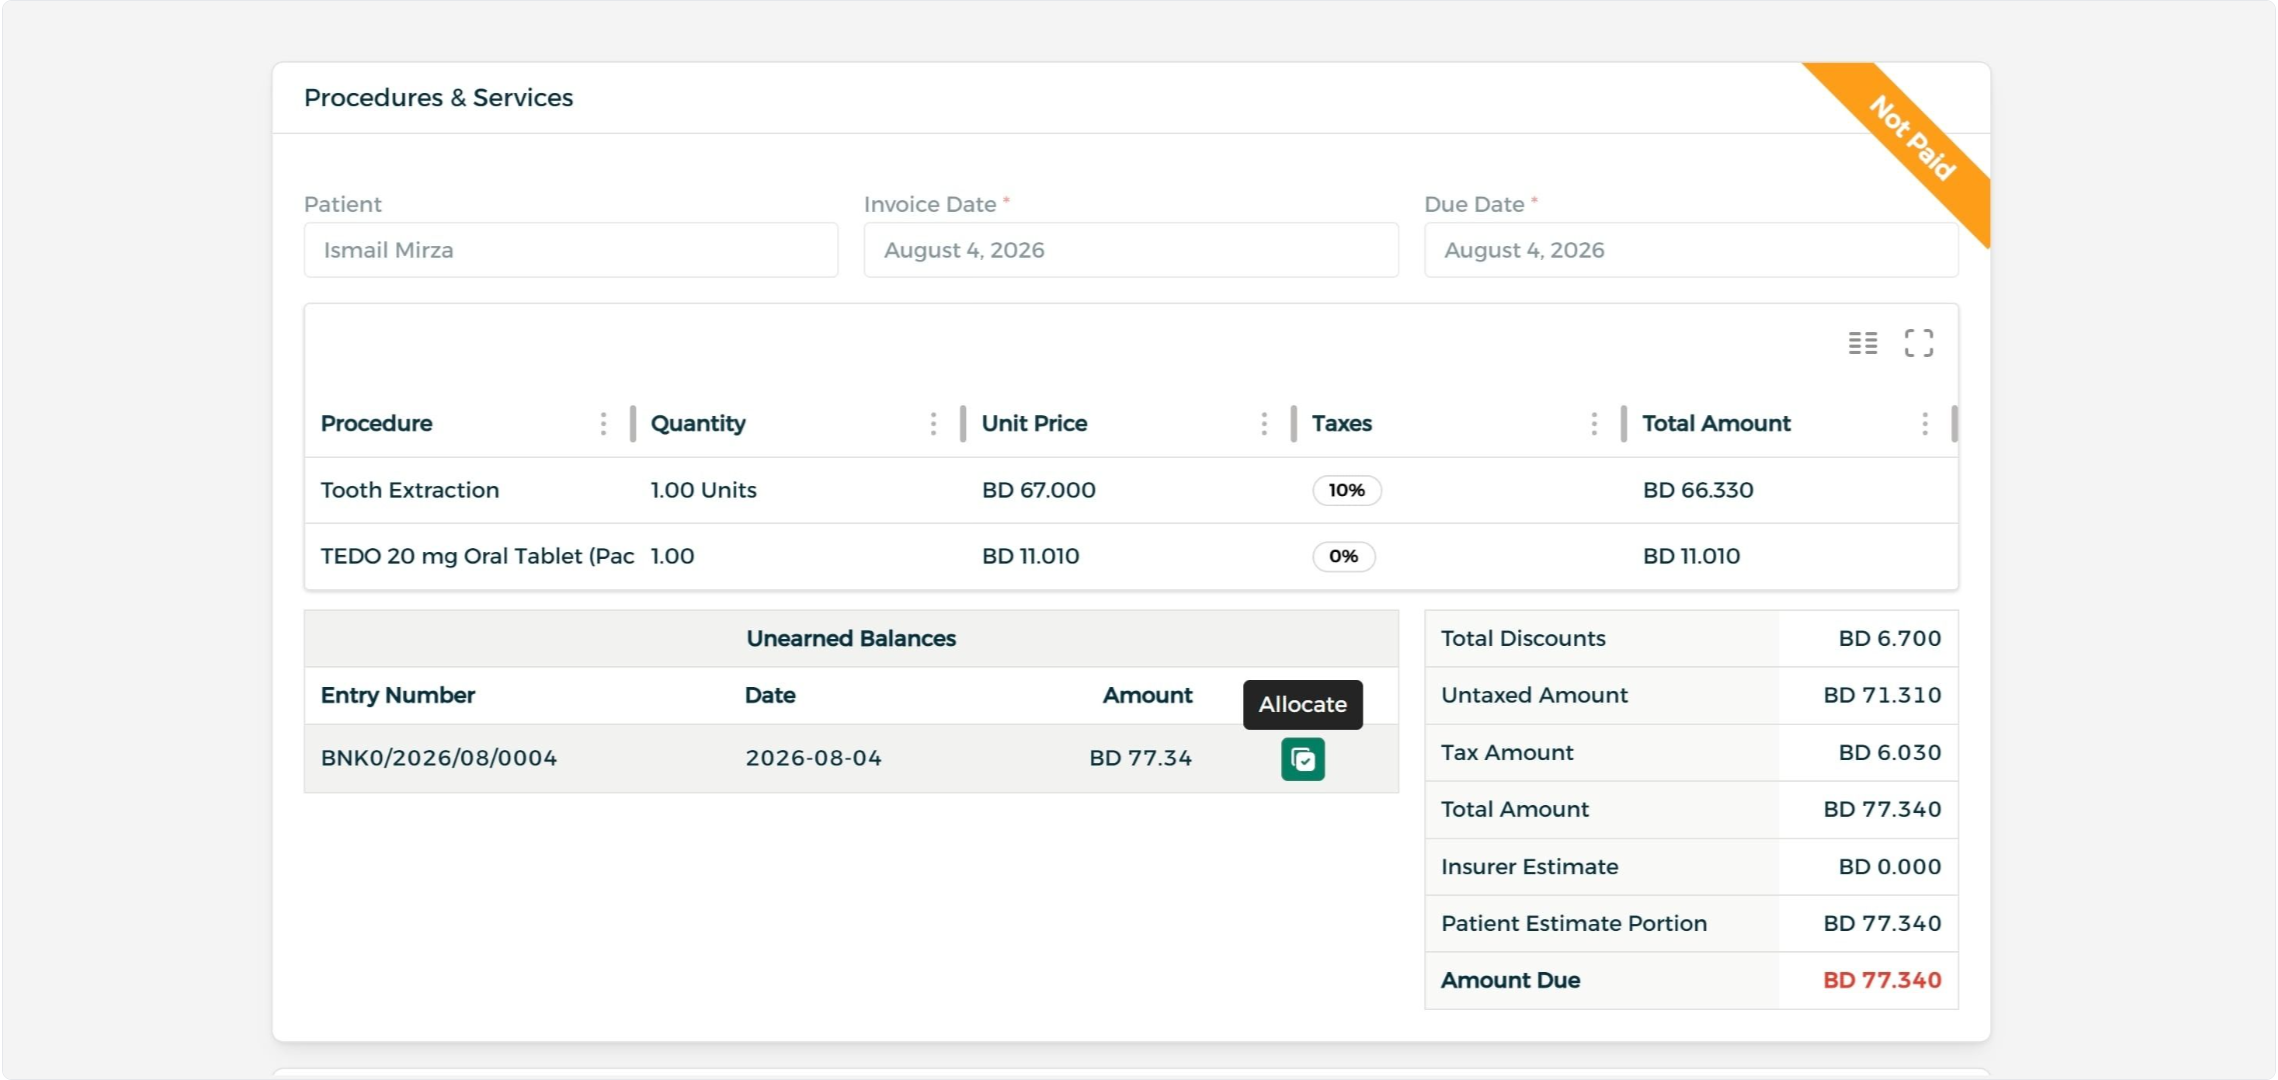
Step 4: Allocate a Payment to an Invoice
Click the invoice to allocate the payment against it — the Allocate button sits under the Unearned Balance section of the invoice details.
Service Packages
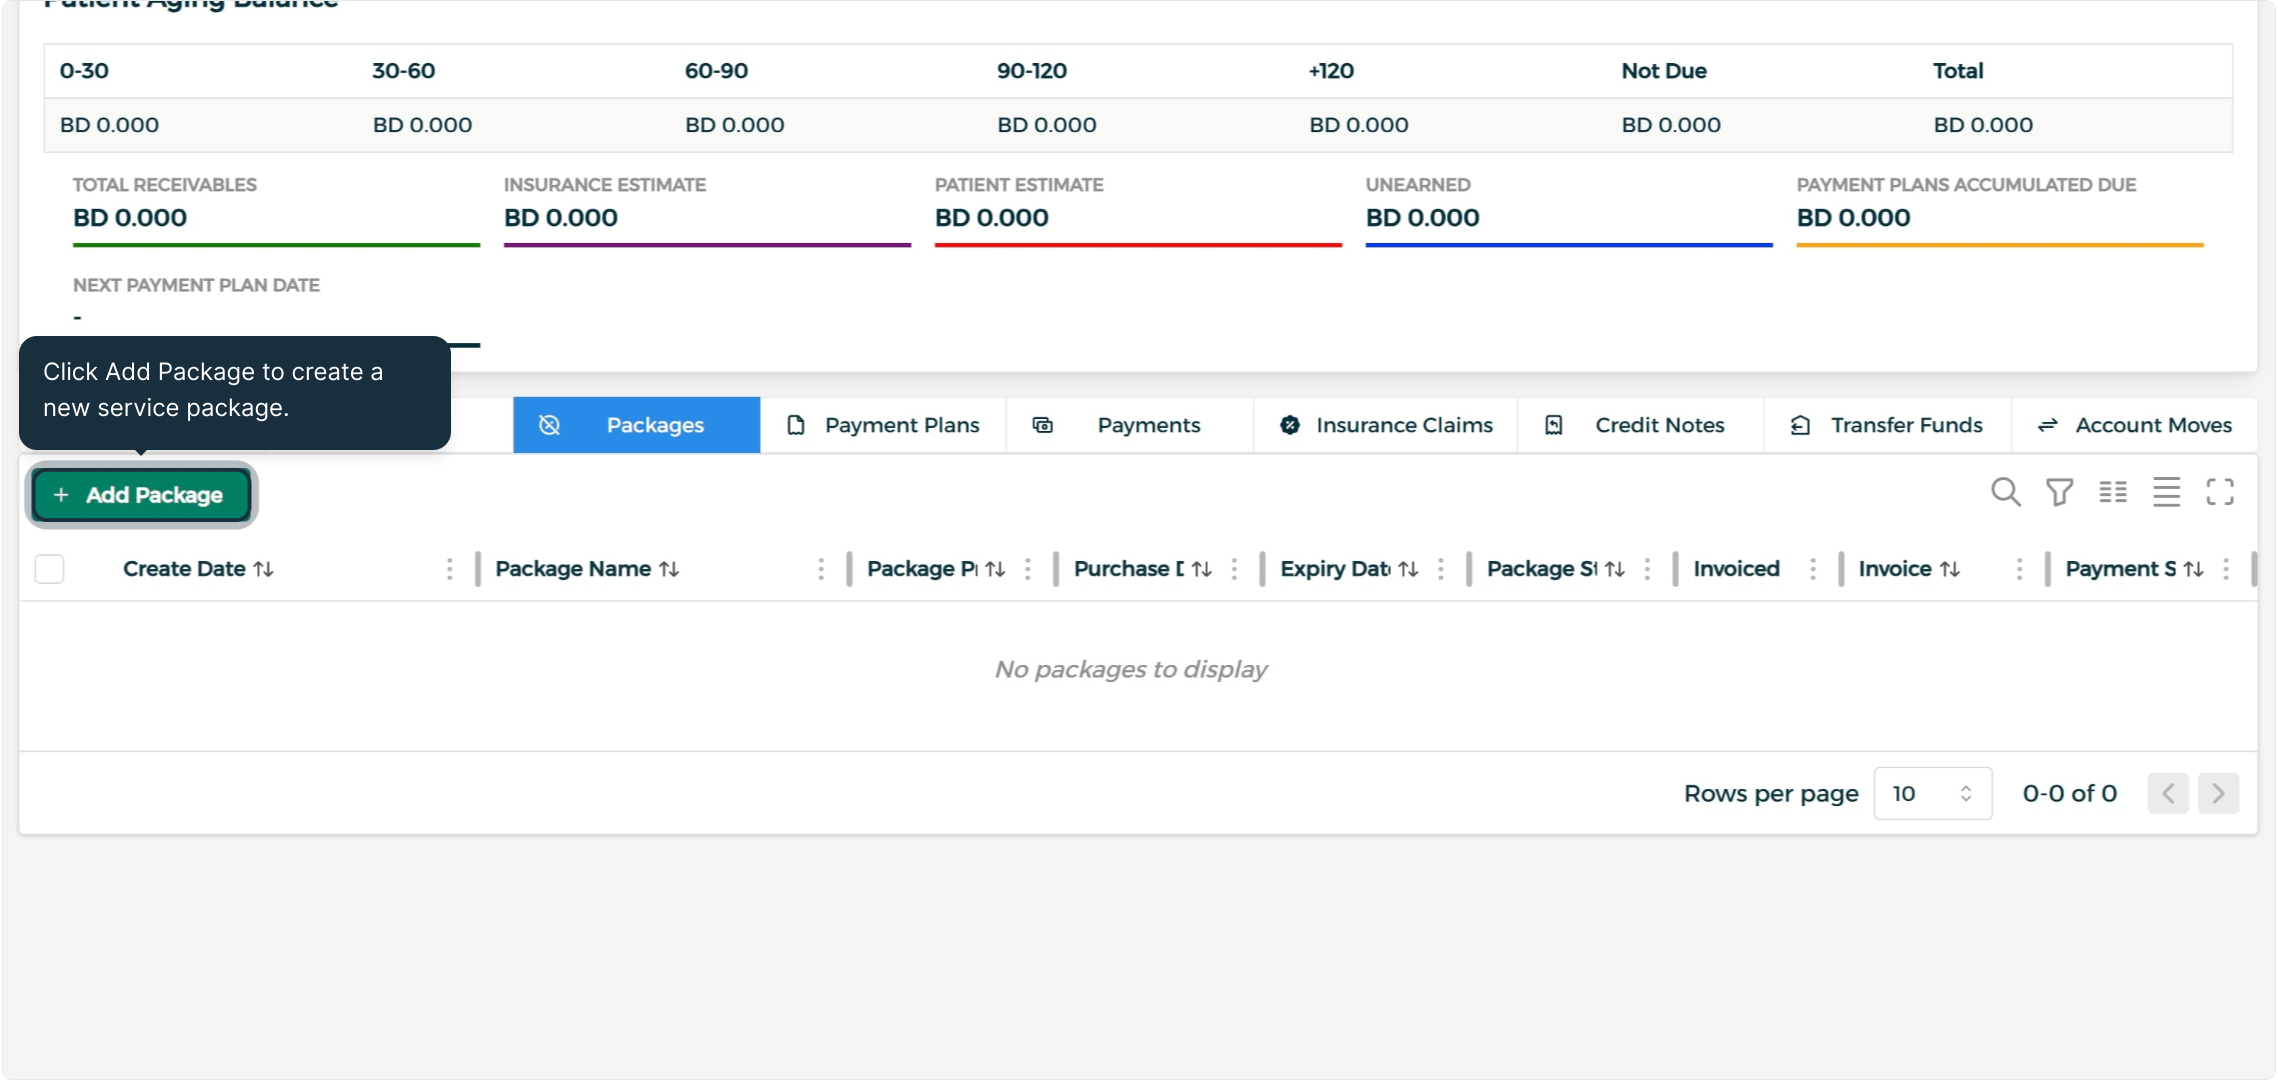
Step 1: Add a Package
Open the Packages tab and click Add Package to create a new package for this patient.
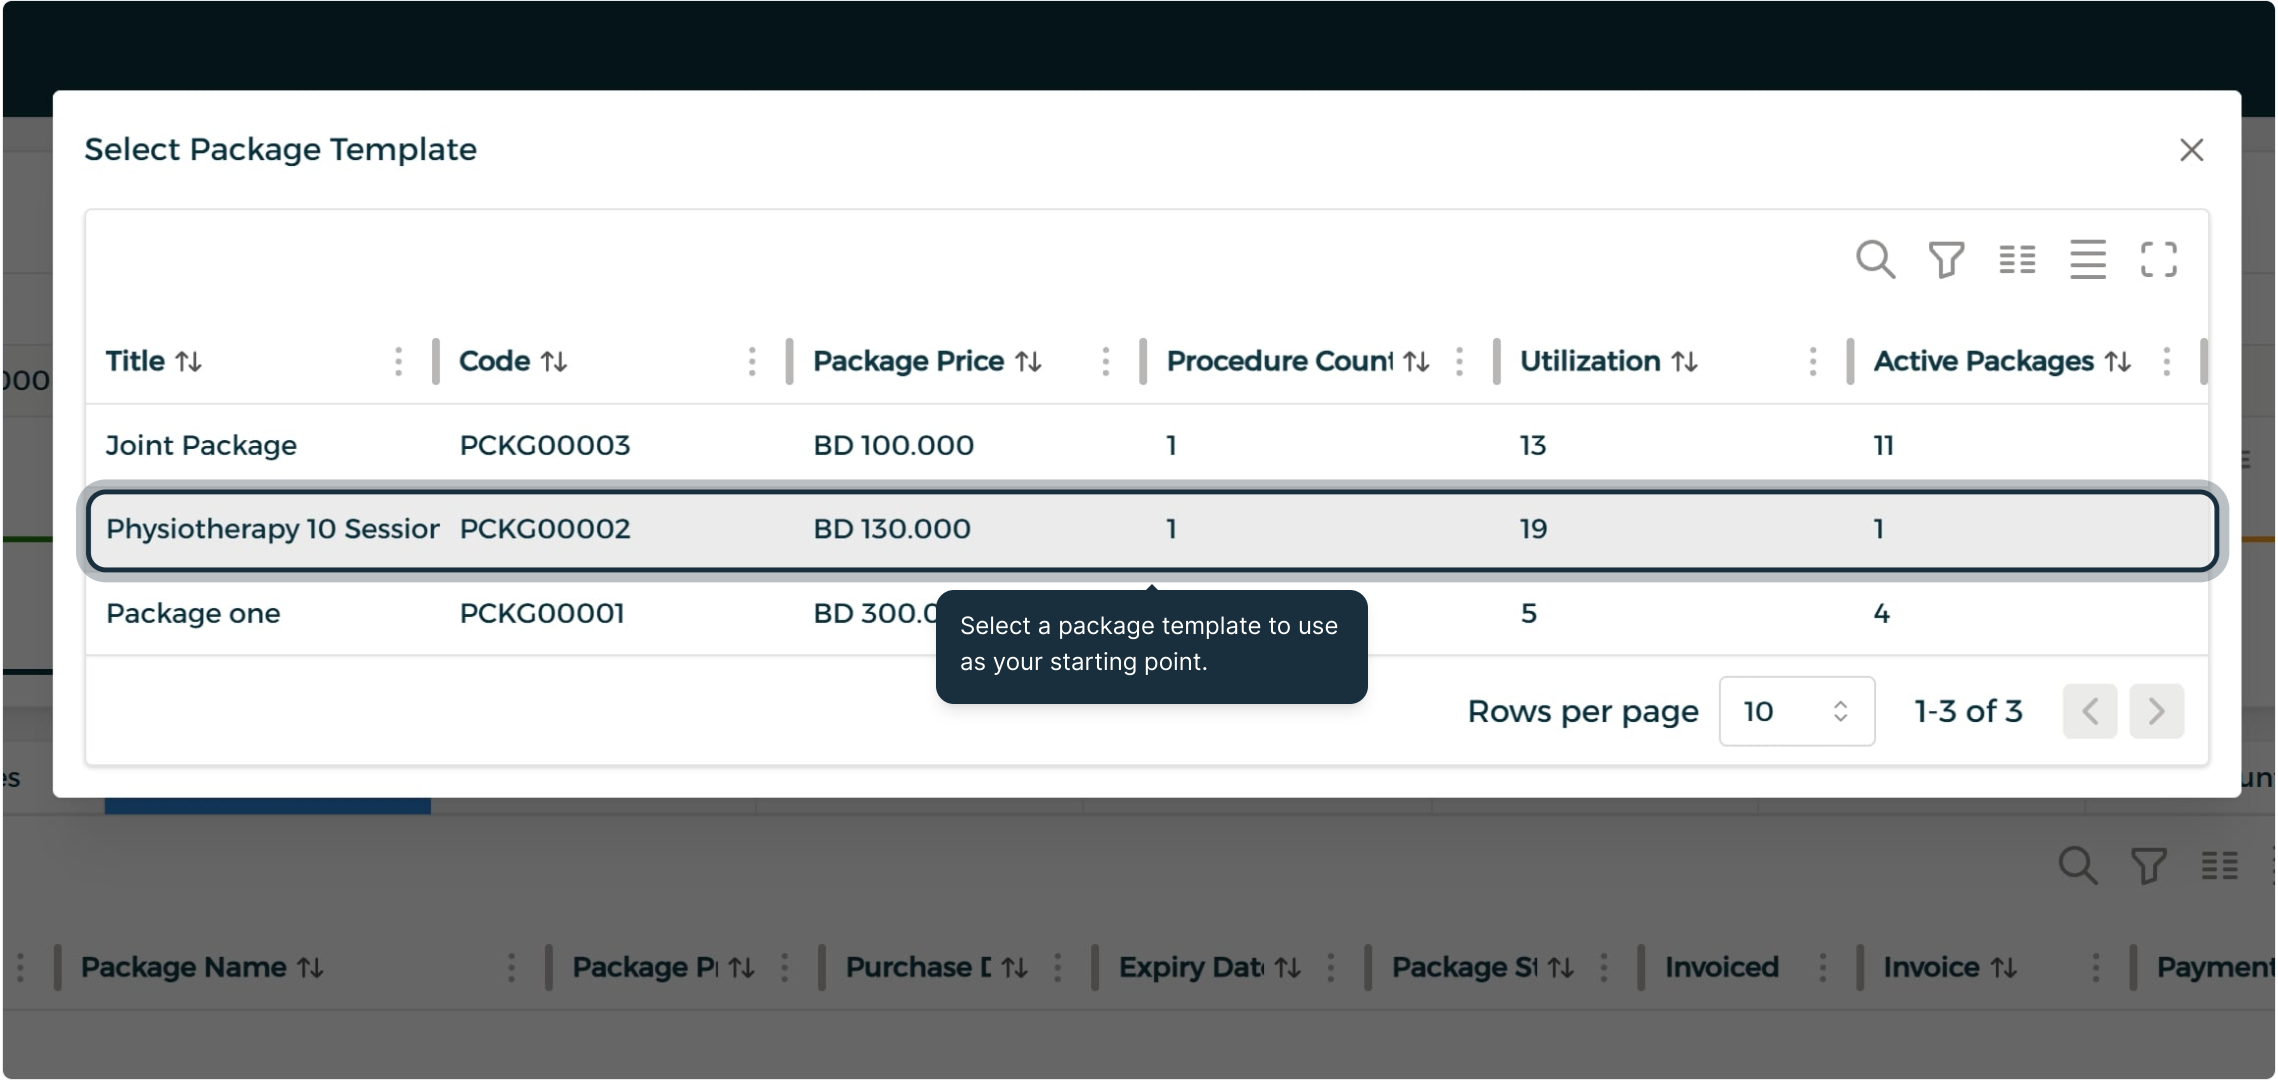
Step 2: Review & Activate a Package
Select a package template as your starting point, then click into the package to review its configuration and activate it once everything looks good.
Payment Plans
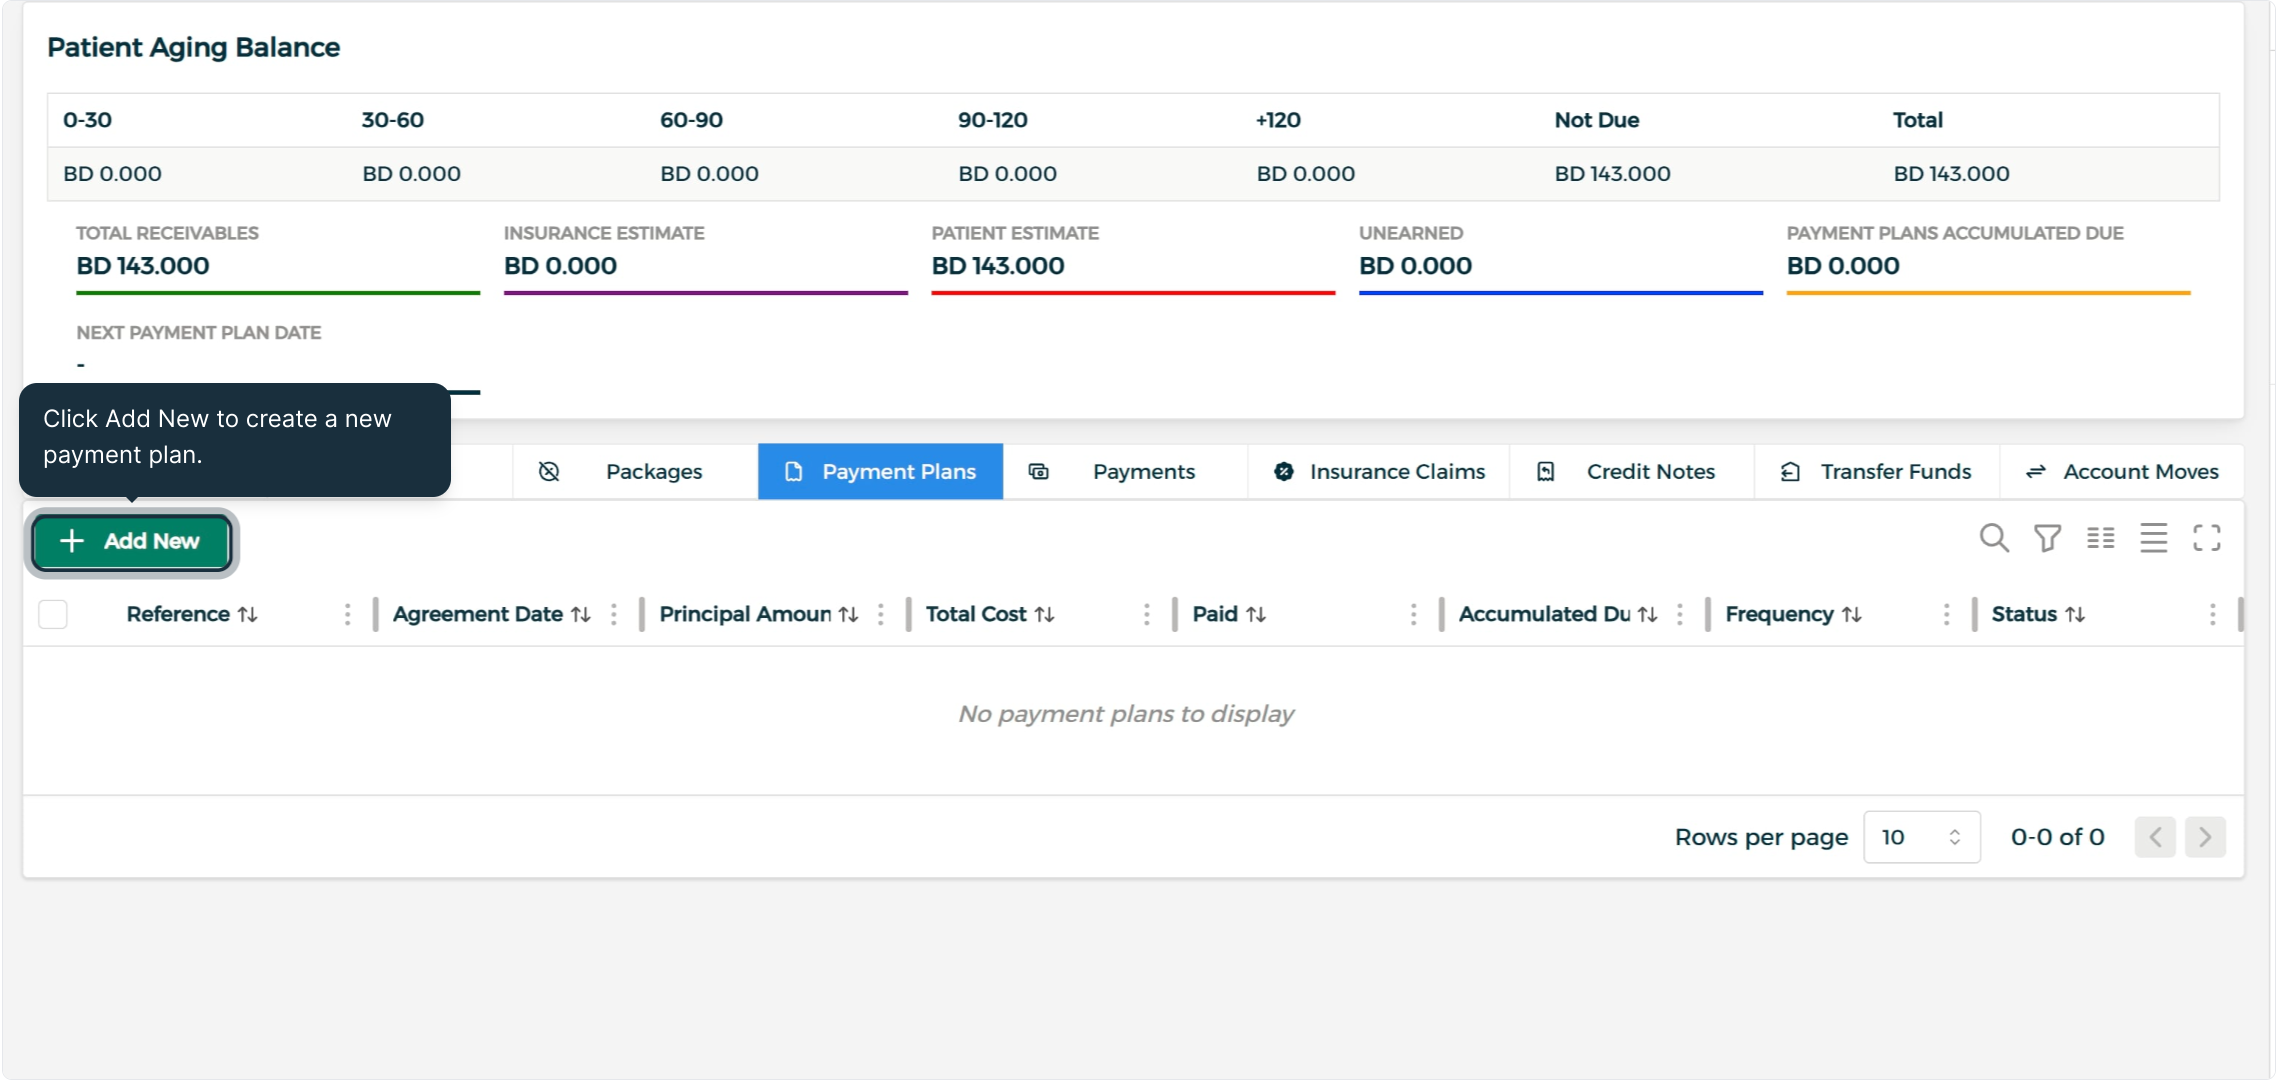
Step 1: Initiate a Payment Plan
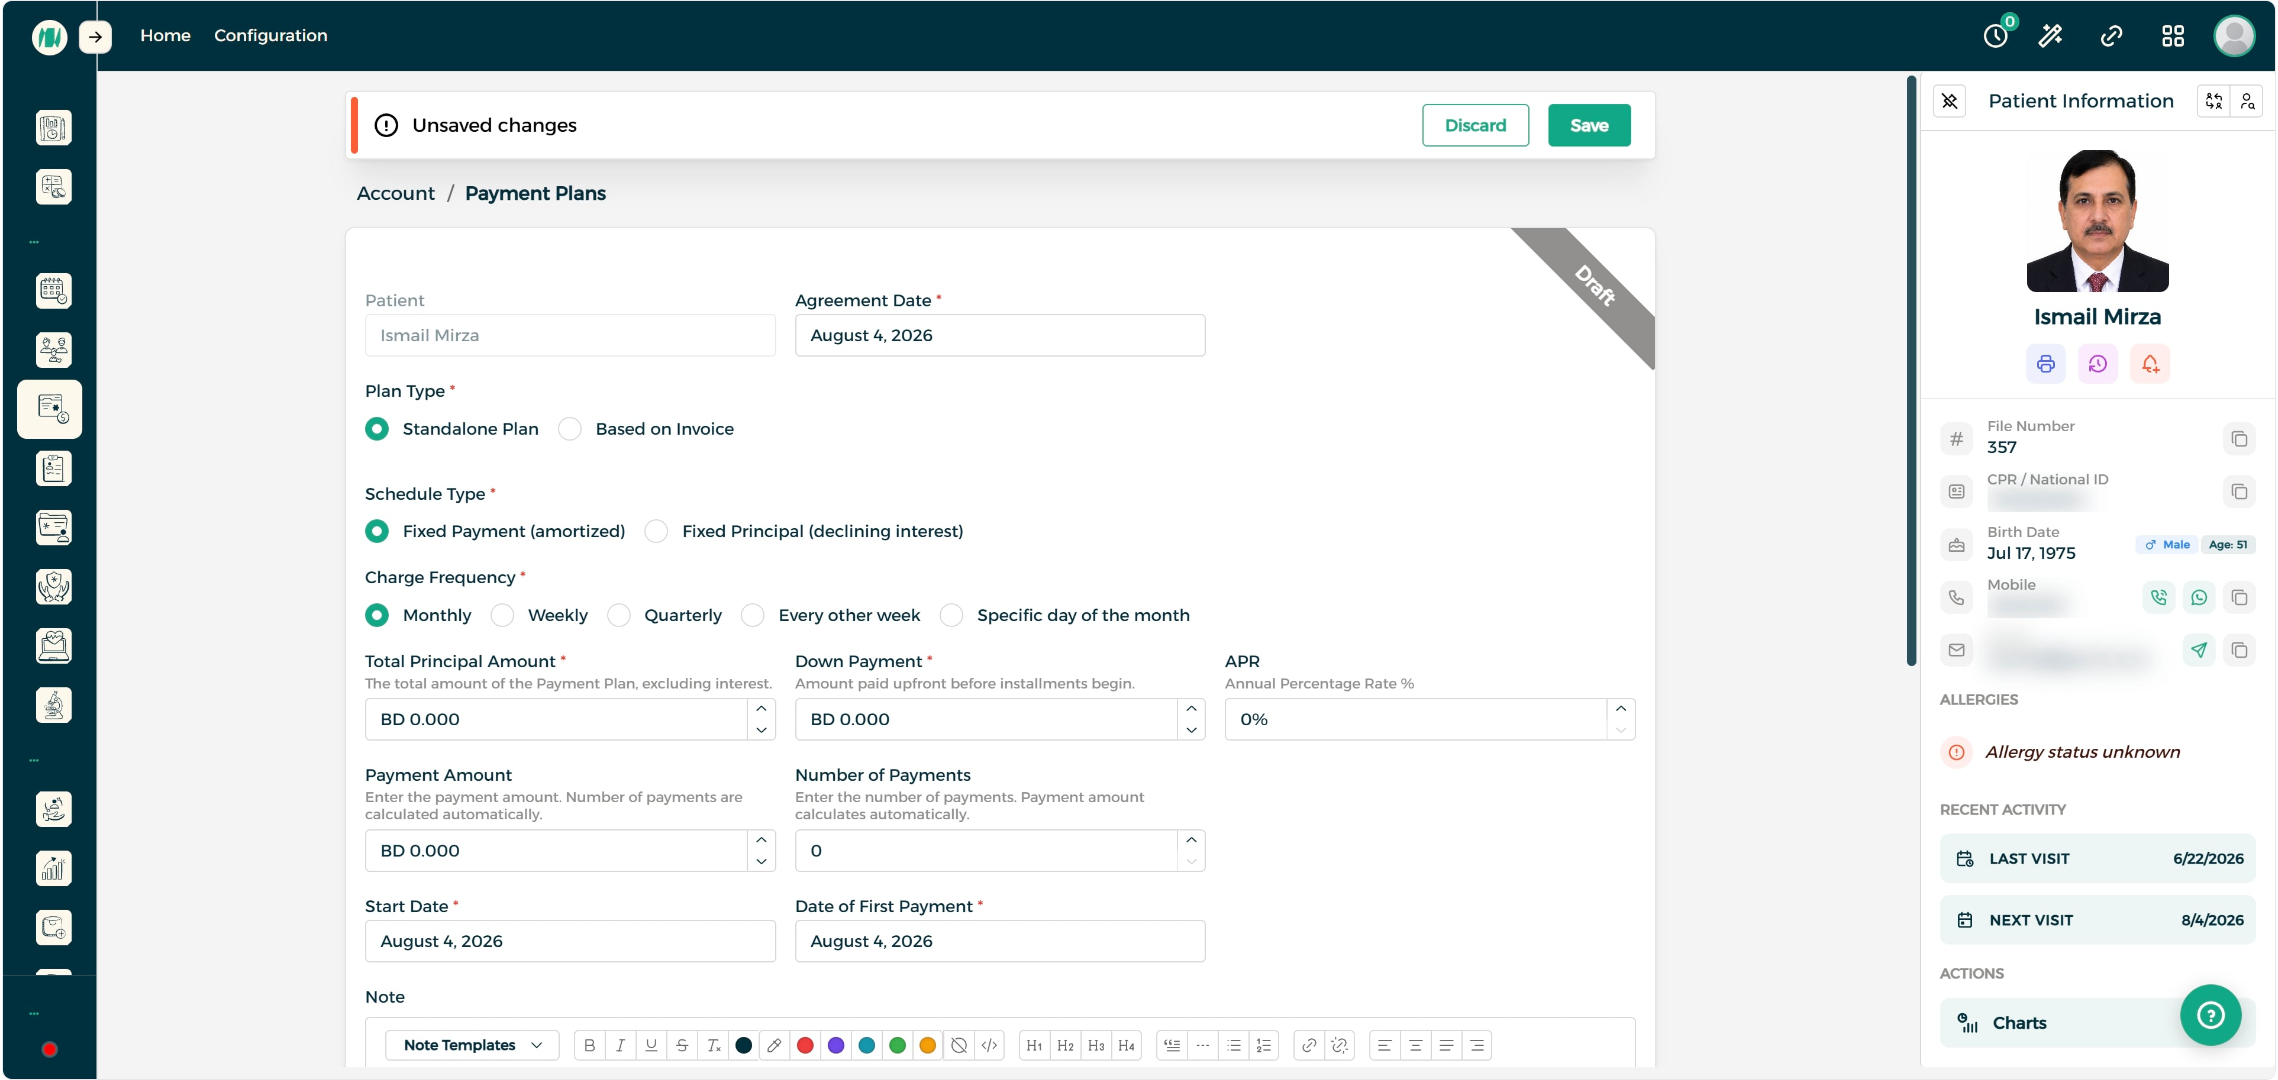
If a patient needs a flexible way to pay, head to the Payment Plans tab and click + Add New to create a custom arrangement.
Step 2: Configure Payment Plan Details
Fill in the required schedule details — such as the Plan Type, Charge Frequency, Total Principal Amount, and Down Payment — then click Save to confirm the plan.
Credit Notes & Refunds
Step 1: Issue a Credit Note
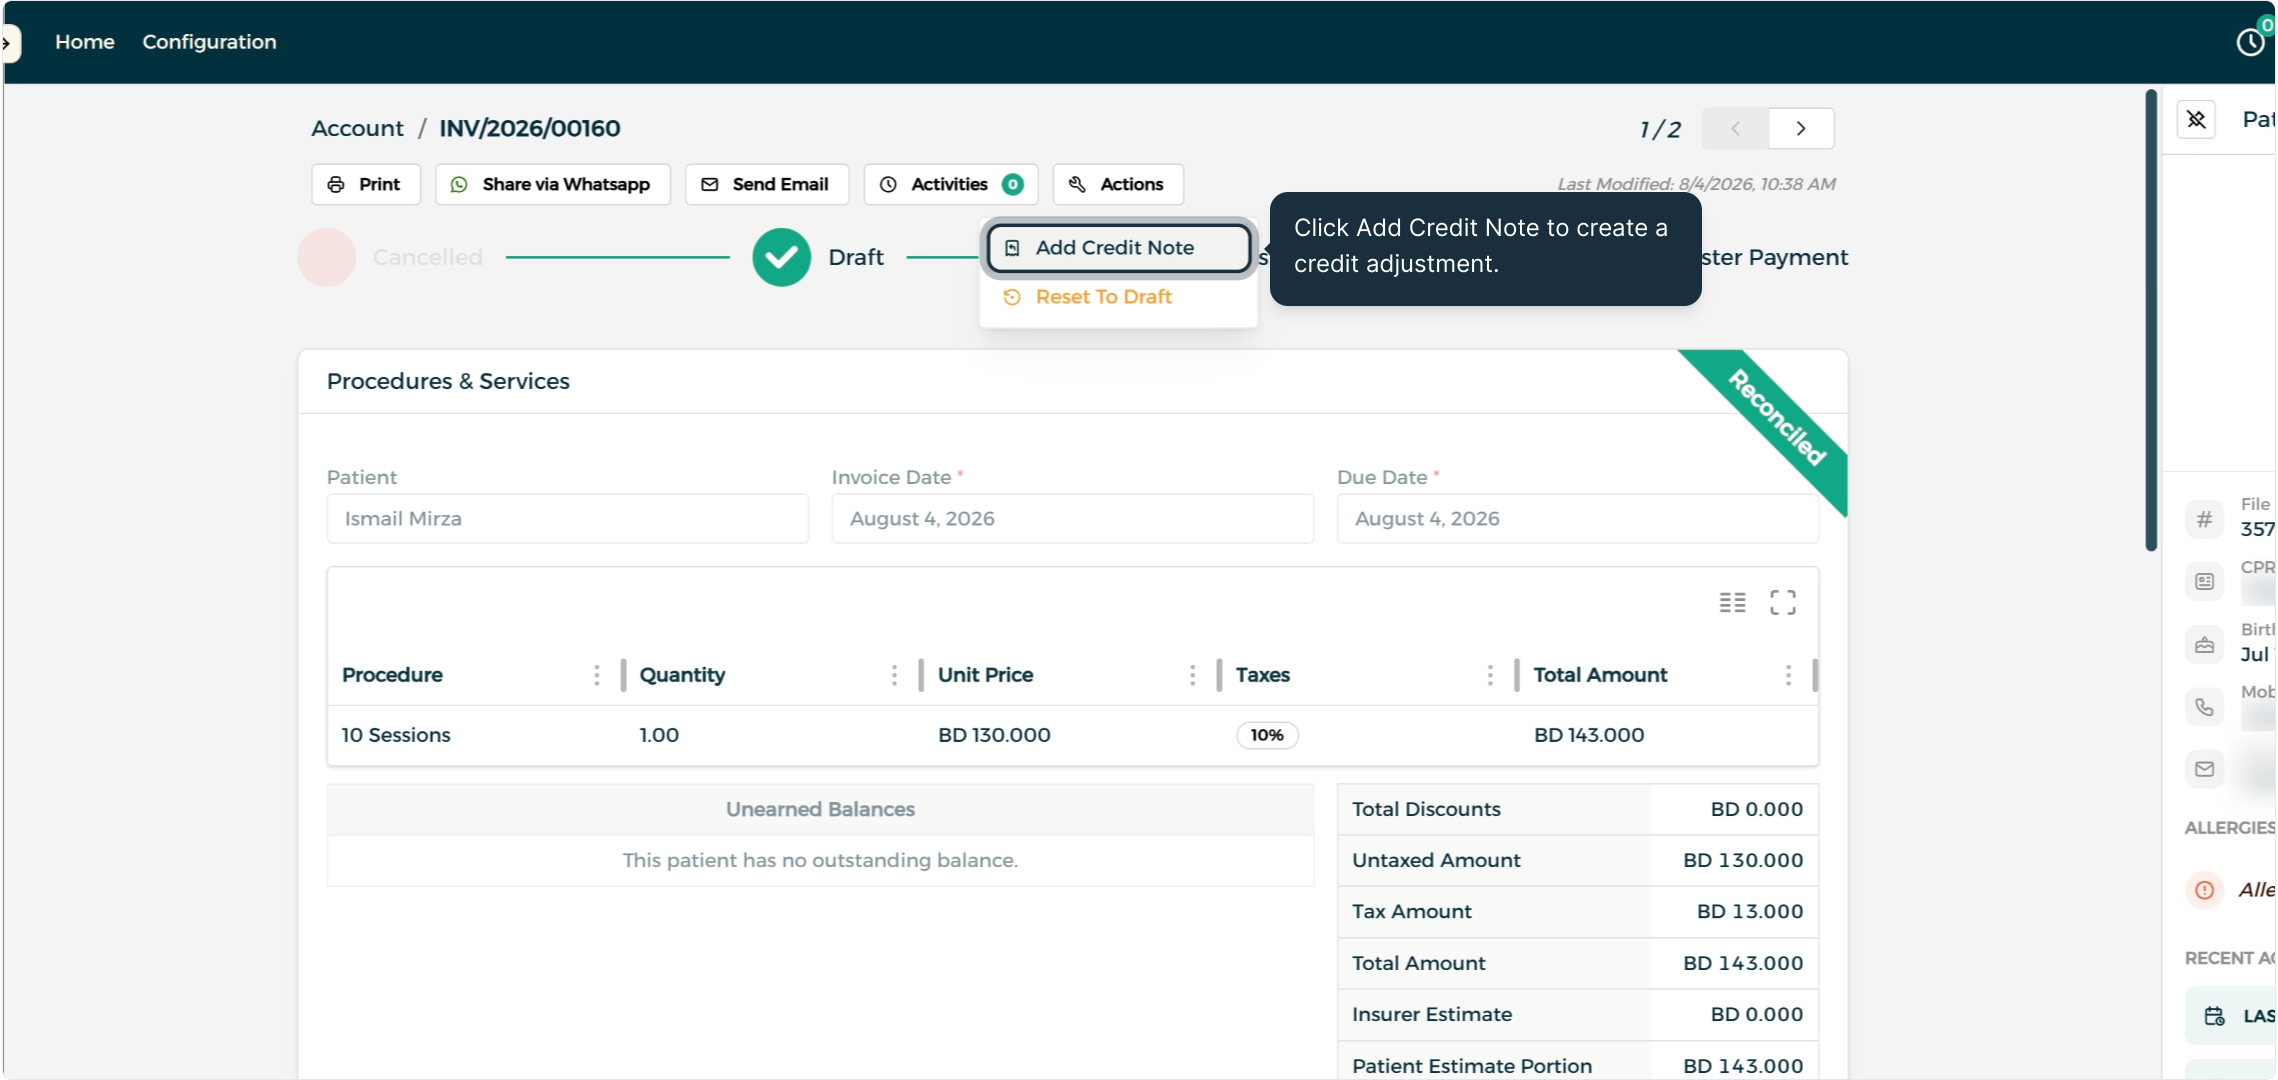
From the original invoice, click Add Credit Note to start a refund adjustment, then enter the refund reason to explain it.
Step 2: Review & Activate a Credit Note
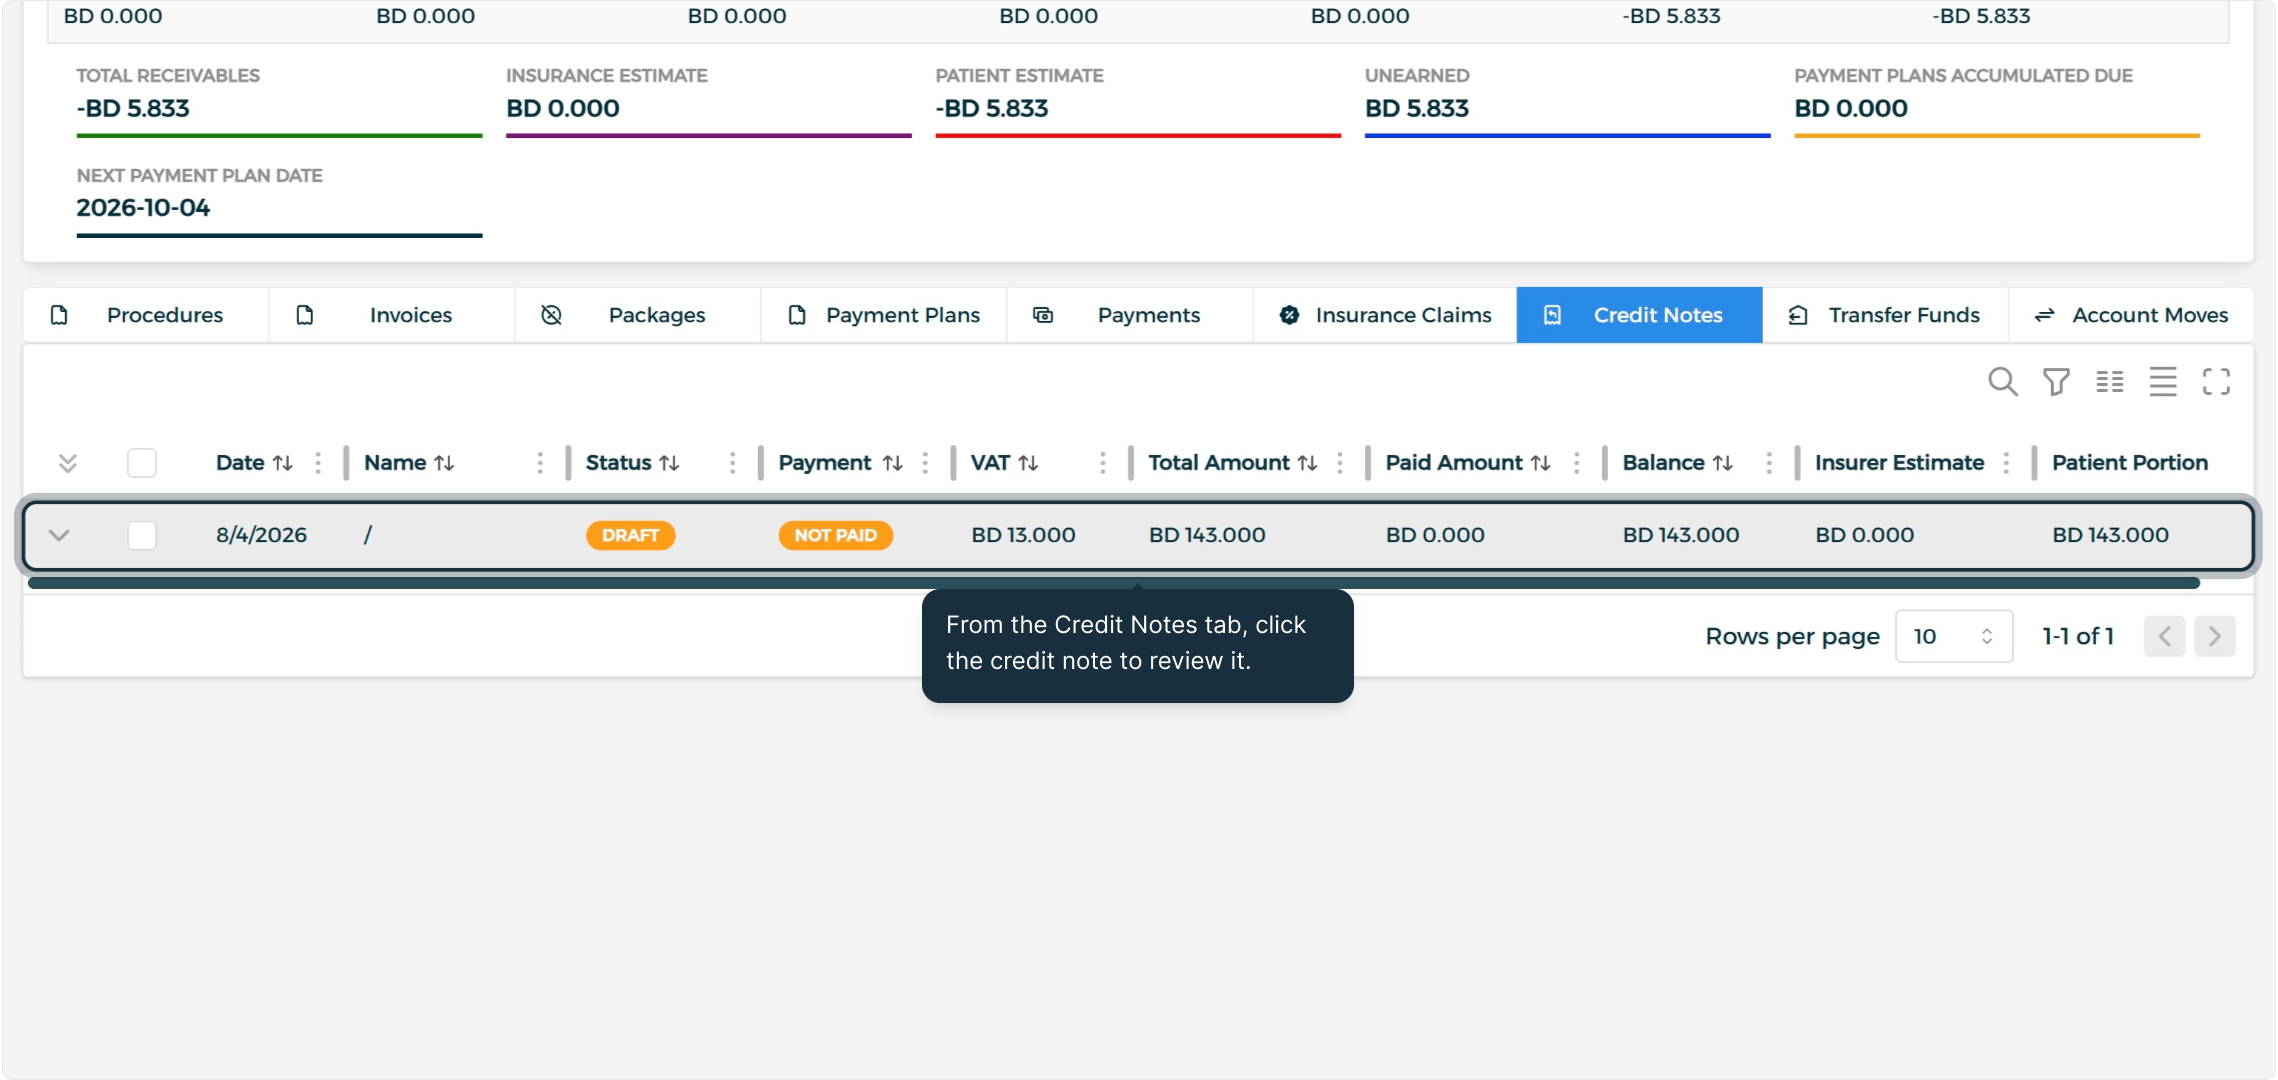
The credit note is created as a draft — head to the Credit Notes tab and click into it to adjust the refund amount or get it activated.
Fund Transfers
Step 1: Create a Fund Transfer
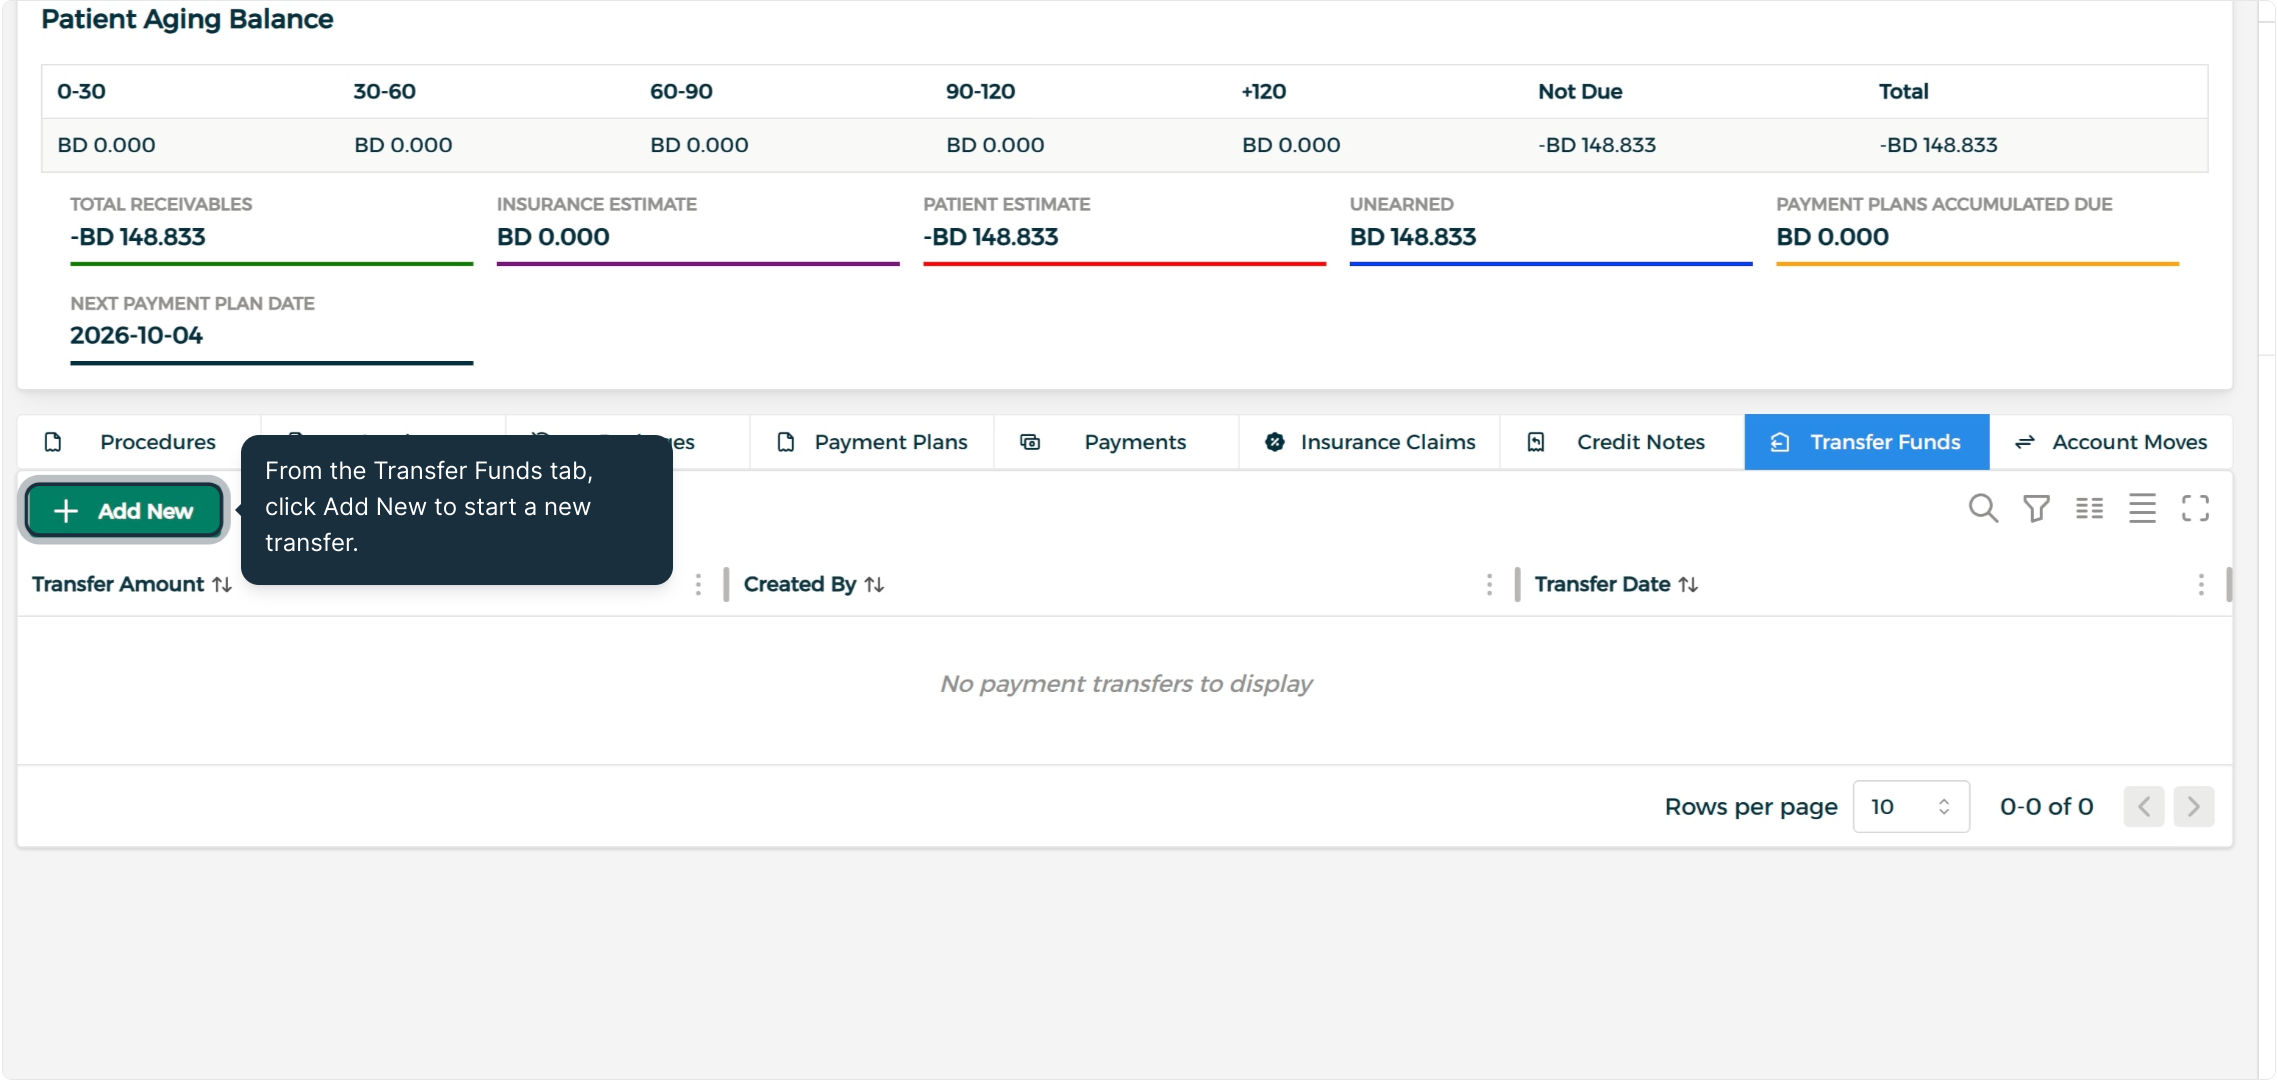
From the Transfer Funds tab, click Add New, then click Add Recipient to choose which patient receives the transfer.
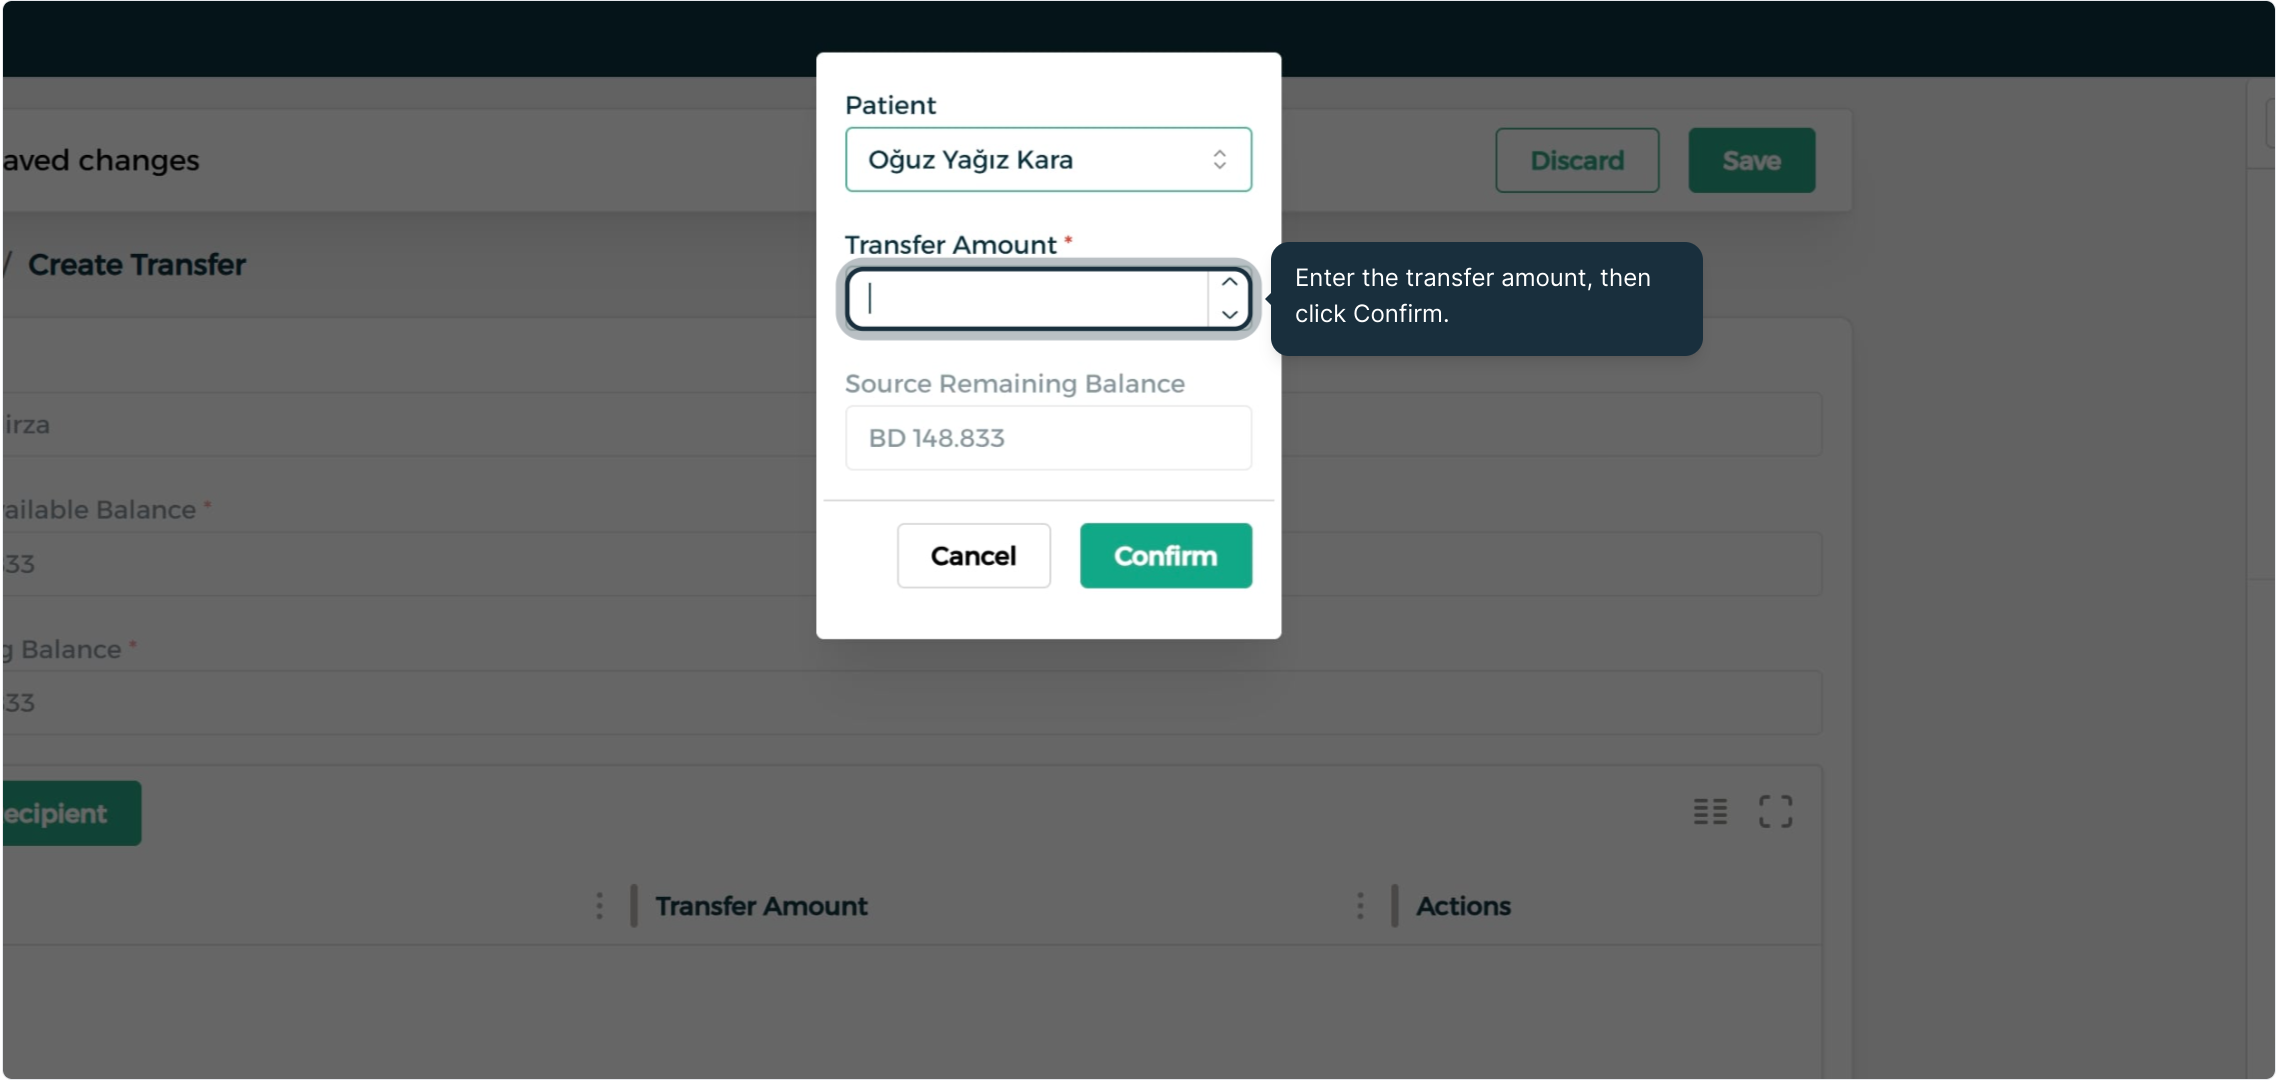
Step 2: Confirm the Transfer
Enter the transfer amount and click Confirm to complete the transaction.
Patient Aging Balance & Account Moves
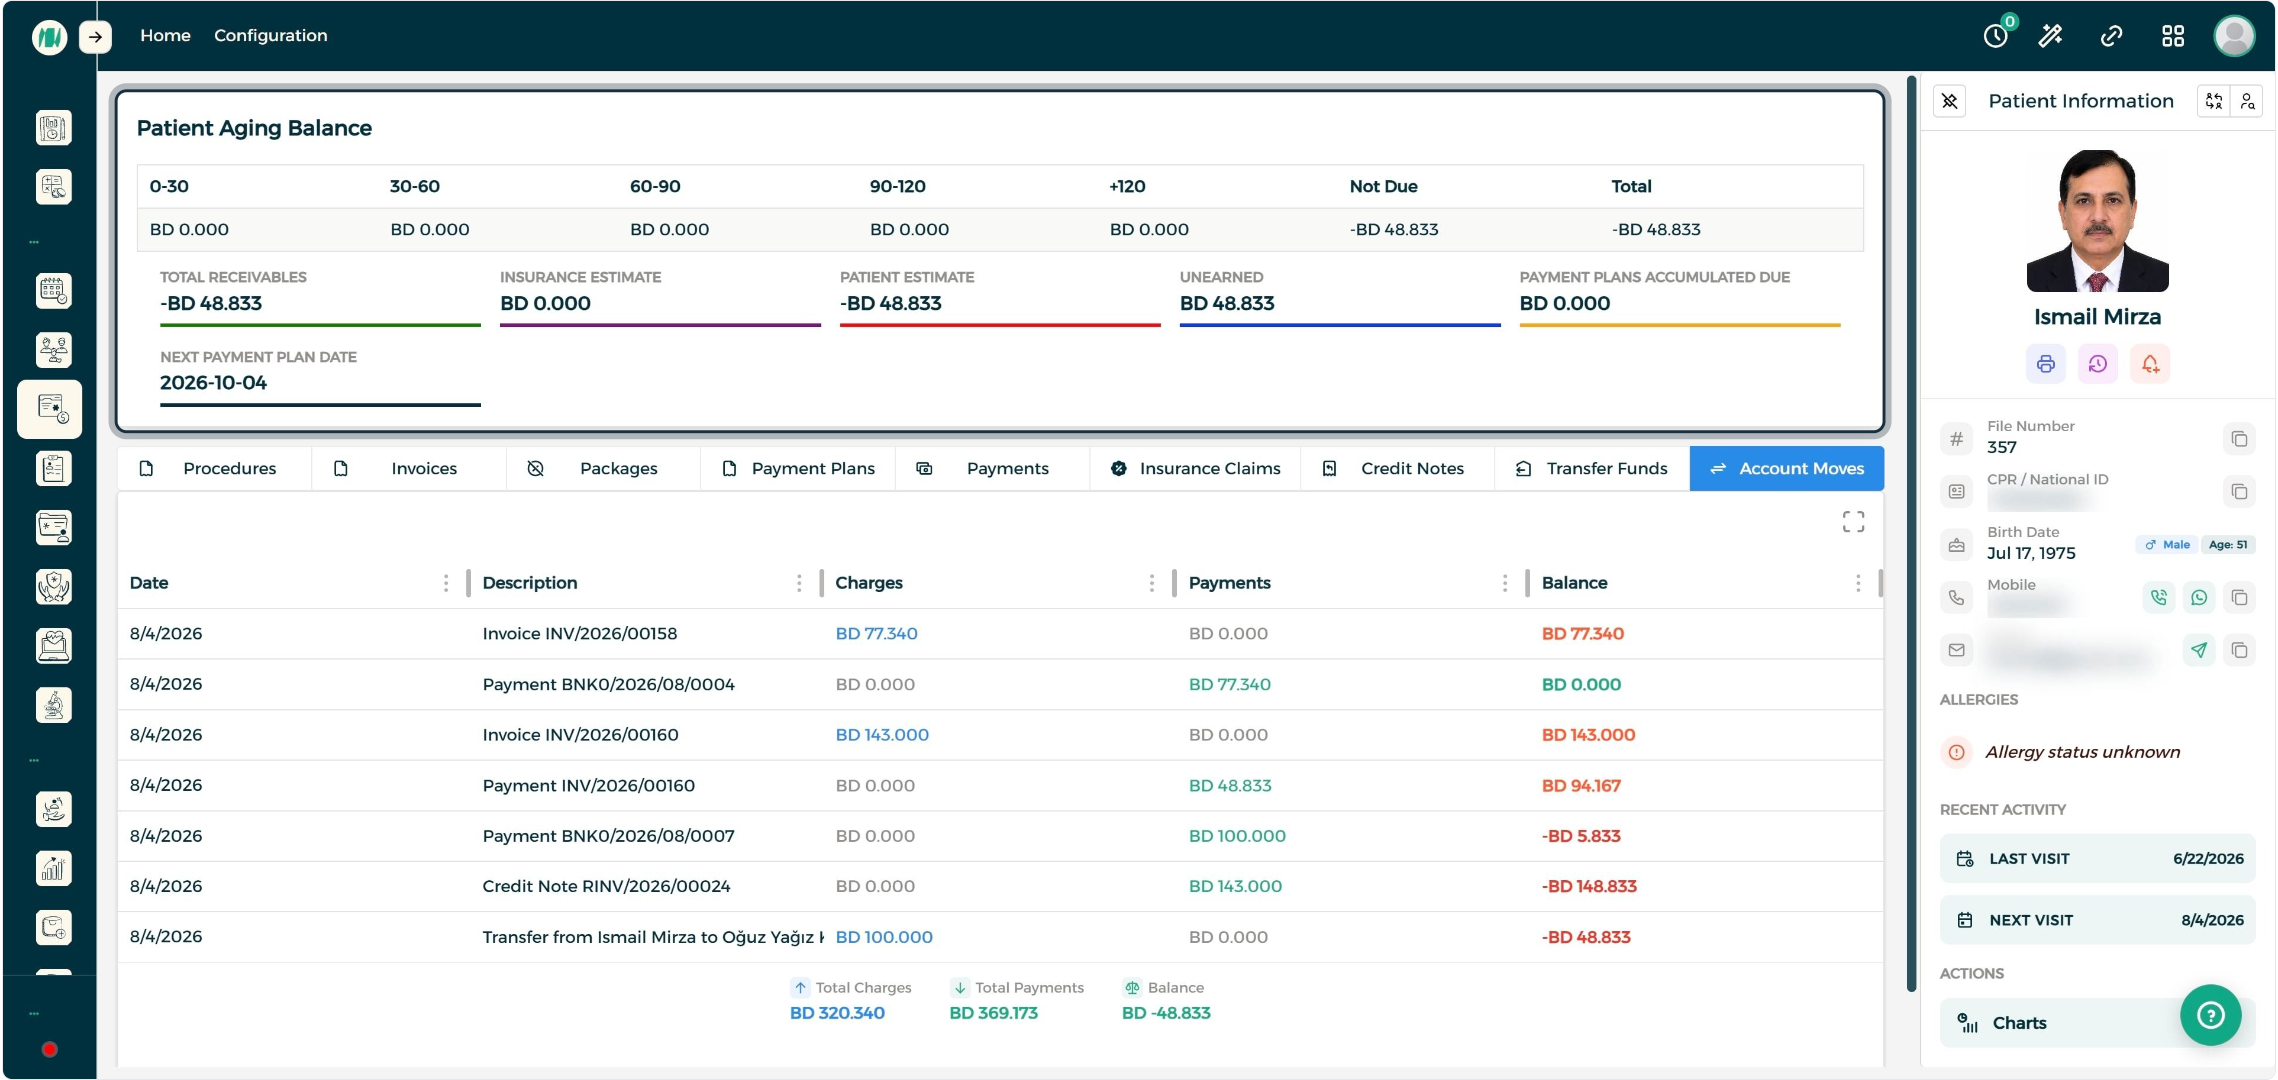
Step 1: Review Patient Aging Balance
Check the Patient Aging Balance for an instant, high-level view of the patient's receivables, insurance estimate, patient estimate, and unearned balances.
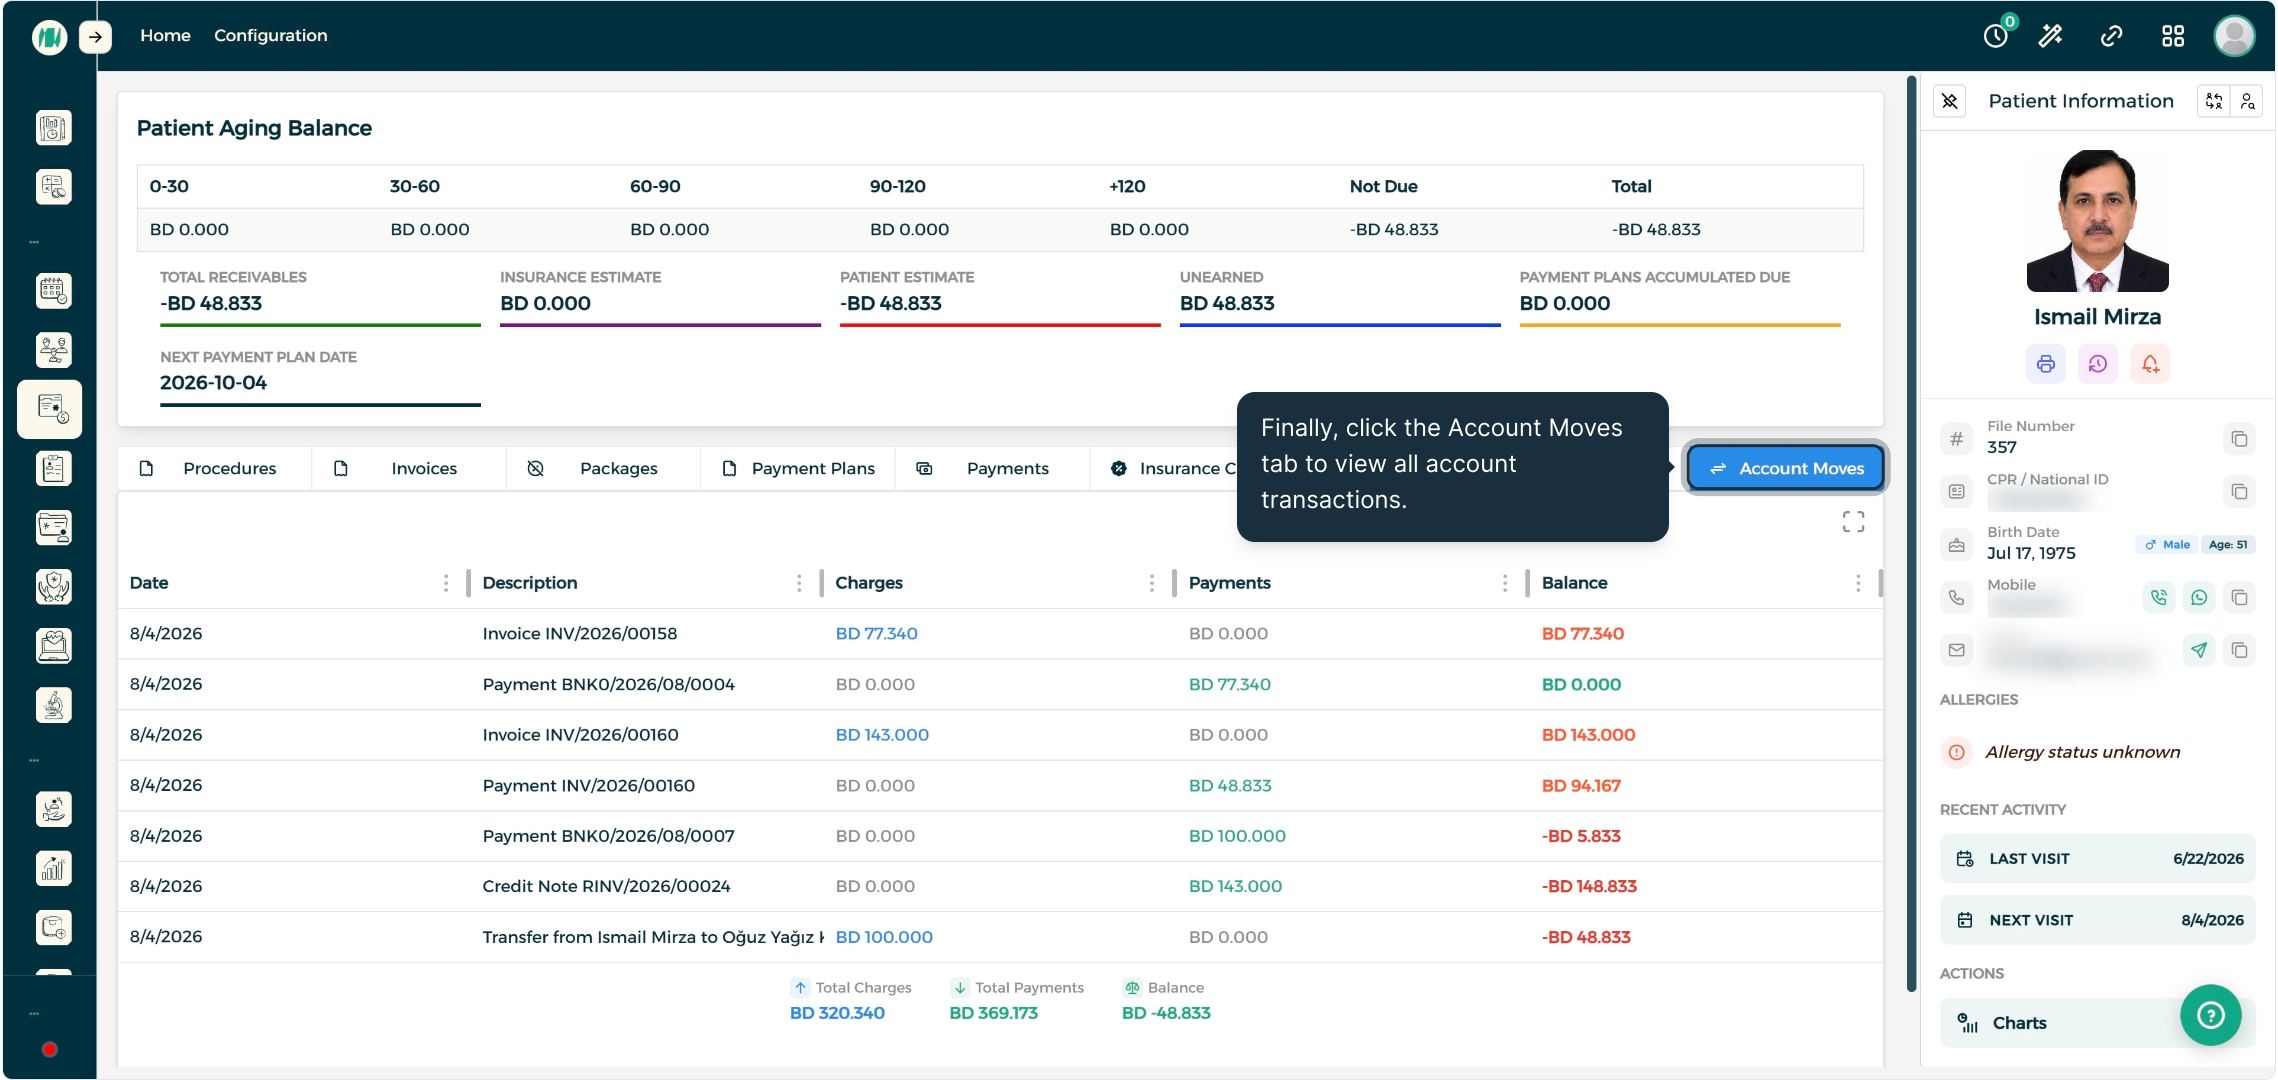
Step 2: View Account Moves
Click the Account Moves tab to bring up every invoice, payment, and transaction recorded on the account.
End-to-End Workflow
From a patient's Medical Billing screen, billing staff can move through the full revenue cycle:
- Select procedures from the Procedures tab and create a draft invoice
- Confirm the invoice once line items and totals are correct
- Register and allocate payments against the invoice as the patient pays
- Add packages or set up a payment plan for patients who need flexible or bundled payment options
- Issue a credit note whenever a refund or adjustment is needed
- Transfer funds between patient accounts when required
- Review the patient's financial standing via Patient Aging Balance or the full transaction history in Account Moves
Best Practices
- Create draft invoices before confirming — review procedures, quantities, and taxes on the draft so corrections are easy before the invoice is locked.
- Allocate payments promptly — link payments to their invoice as soon as they're registered so unearned balances stay accurate.
- Use packages and payment plans for recurring care — they keep multi-visit or installment-based treatment billed consistently instead of invoice-by-invoice.
- Document the reason on every credit note — a clear refund reason keeps the audit trail clean for VAT reporting.
- Check Patient Aging Balance regularly — it's the fastest way to catch overdue receivables before they become harder to collect.
FAQ
Q: What's the difference between a payment and a payment plan? A payment is a single amount registered against an invoice. A payment plan schedules multiple payments over time for patients who prefer to pay in installments.
Q: Can I add more procedures to an invoice after it's created? Yes — from the invoice details, you can expand the list with another procedure before confirming it.
Q: How do I refund a patient? Open the original invoice and click Add Credit Note, enter the refund reason, then review and activate the credit note from the Credit Notes tab.
Q: Where can I see a patient's overall financial picture? Use the Patient Aging Balance for a high-level summary, or Account Moves for the full list of invoices, payments, and transactions.
Q: Can I move funds from one patient's account to another's? Yes — use the Transfer Funds tab, add a recipient, enter the amount, and confirm to complete the transfer.